


By default, WooCommerce‘s built-in features for invoice generation are quite limited – offering little in the way of customization or automation. Plugins like BizPrint unlock a world of possibilities, allowing you to create tailored, professional invoices that align with your brand and fulfill specific needs, such as generating credit notes or proforma invoices.
Customized invoices are about more than aesthetics. A professional invoice makes the details your customers should know clear before they approve payment, which helps you get paid faster. With the ability to create many types of invoices, businesses can improve brand recognition, maintain a professional appearance, and streamline yearly tax filing. These elements are crucial for both operational efficiency and delivering a refined customer experience.
In this guide, we’ll show you how to leverage BizPrint to create uniquely tailored WooCommerce invoices with ease. You’ll learn step-by-step techniques to set up and customize templates, integrate branding elements, automate processes, and address common invoicing challenges.
Understanding WooCommerce invoice elements
Successful invoices require balancing key elements that ensure clarity, professionalism, and compliance. From must-have sections to design enhancements, thoughtful invoices better serve both your business and your customers while aligning with your brand identity.
Essential invoice components
A well-structured invoice should clearly provide the necessary details for both bookkeeping and customer reference. These include:
- Required invoice sections: Include company name and address, invoice number, itemized charges, taxes, and payment terms. For example, taxes must be shown prominently to remain compliant with regional regulations, especially for businesses using VAT in the EU or GST in Australia.
- Legal requirements: Depending on your location, you may need to display tax info like a VAT ID or company registration number. Tip: Always include the phrase “Tax Invoice” at the top if it’s needed for legal compliance in your region like in Australia.
- Standard information placement: Dates, descriptions, and expenses should take priority at the top third of your invoice. For example, place due dates directly below the payment total for clear visibility.
Customizable fields and sections
Tailor your invoices to match your business needs:
- Elements that can be modified: Customize fields like order summaries or add personalized notes. For instance, use this space to feature promotions: “Save 10% on your next order with code RENEW.”
- Optional invoice components: Remove irrelevant fields like separate shipping details for pickups, or include personalized touches like gift messages for specialty orders. Field arrangement options: Structure information based on priority. For service-based businesses, highlight service descriptions and costs above subtotals.
Layout and design options
This is your chance to reinforce brand identity while optimizing readability.
Considerations include:
- Template structure: Use BizPrint’s pre-designed templates or create custom templates tailored to specific industries. For example, an online store might require fields for Stock Keeping Units (SKUs), while a food business benefits from space for menu item adjustments.
- Visual element placement: Place logos clearly at the top-left or top-center of the invoice. Tip: Keep brand colors consistent and extend this to typography – if your website uses navy blue headings, use the same color on your invoices.
- Hierarchy of information: Arrange content so the focus remains on the payment total first and item breakdown next. Centrally positioned totals in bold fonts ensure customers immediately see what’s due.
Double-check the preview of your invoices by printing a sample to verify how readable the document will be on physical formats. Ensure that customers using mobile phones for PDFs are still able to read totals or headers clearly without excessive scrolling.
Next, let’s explore how to put this knowledge into action by customizing your invoices with BizPrint, leveraging advanced options to simplify workflows and reflect your unique style.
Customizing your invoice with BizPrint
A custom PDF invoice serves as a powerful business document – it communicates transaction details while strengthening your brand’s market presence. BizPrint’s templates offer an excellent starting point, allowing you to fine-tune invoices to match your branding, include key information, and integrate advanced personalization options. If you haven’t installed BizPrint yet, follow this guide to quickly install and activate BizPrint and set up your environment for customization.
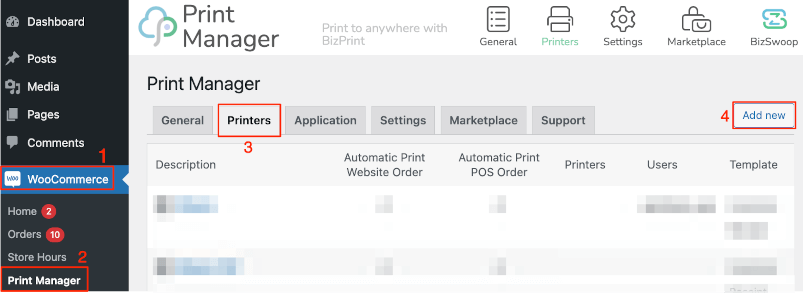
Now, in your WordPress dashboard, go to WooCommerce > Print Manager > Printer. Click the ‘Add New’ button. Now you can see all the customization options available for you.
For the purpose of quickly tailoring your invoice, start with the Templates section – simply use the drop-down to select from a number of built-in templates. BizPrint includes free pre-made templates:
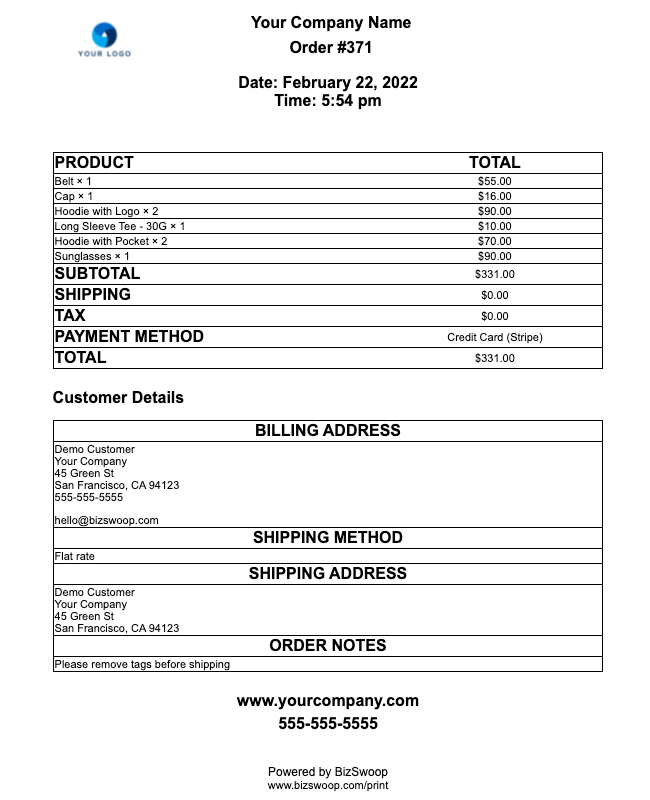
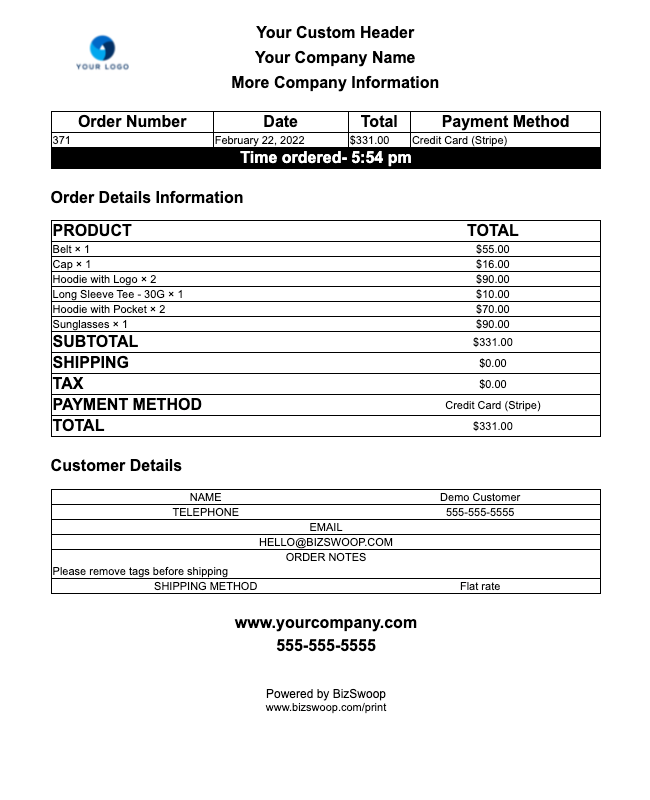
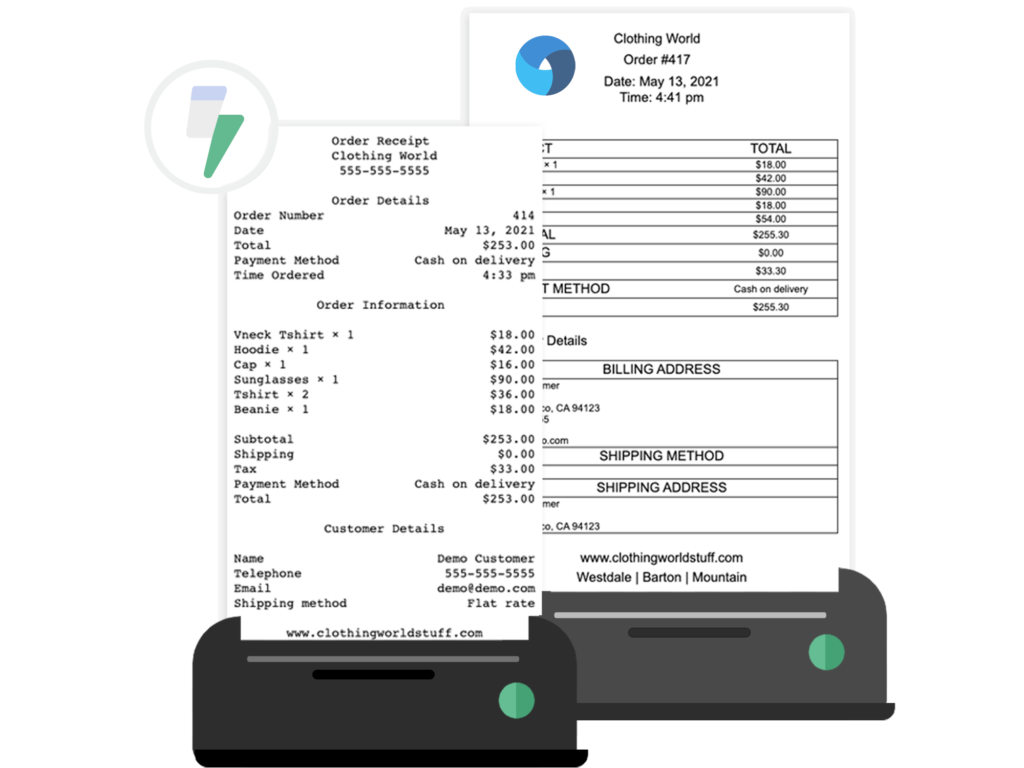
All of these are available in different sizes (A4, letter, or thermal printer), and you can auto-print or auto-save to PDF as your orders come in. Below are three order templates included free with BizPrint:
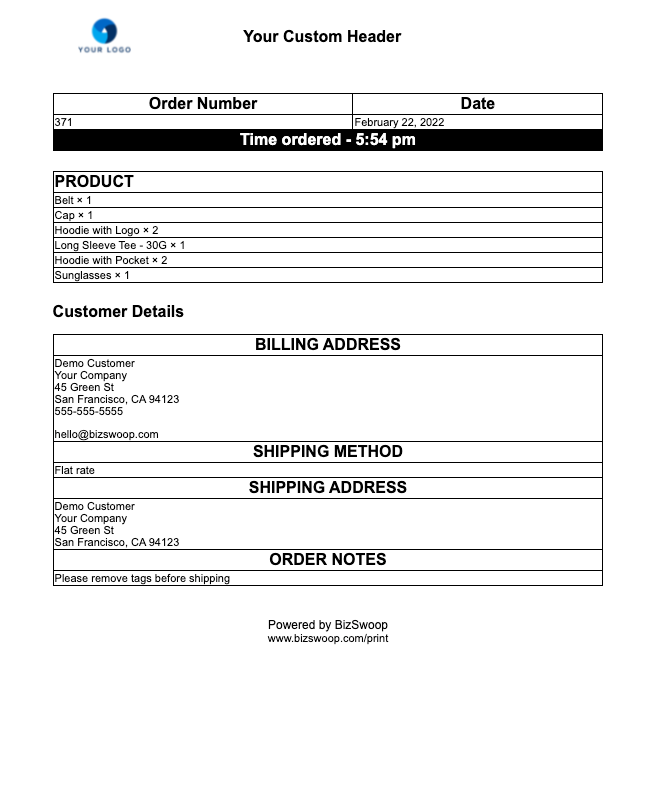
If you select an invoice template, you’ll see a number of options to include the elements that are normally included in a standard invoice. Tick the ones you need. You can edit the line items when required or for certain clients.
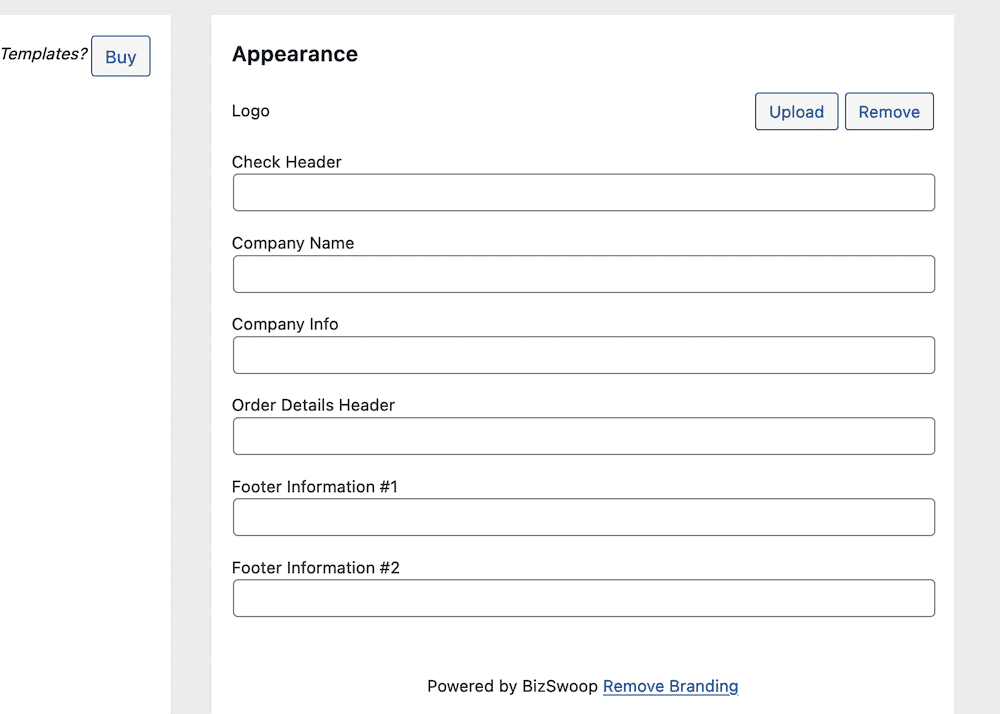
Next, you can adjust the branding elements of the invoice. You can add your logo, company name, company information, purchase details, custom fields, and any footer information you wish to include, such as a policy or terms.
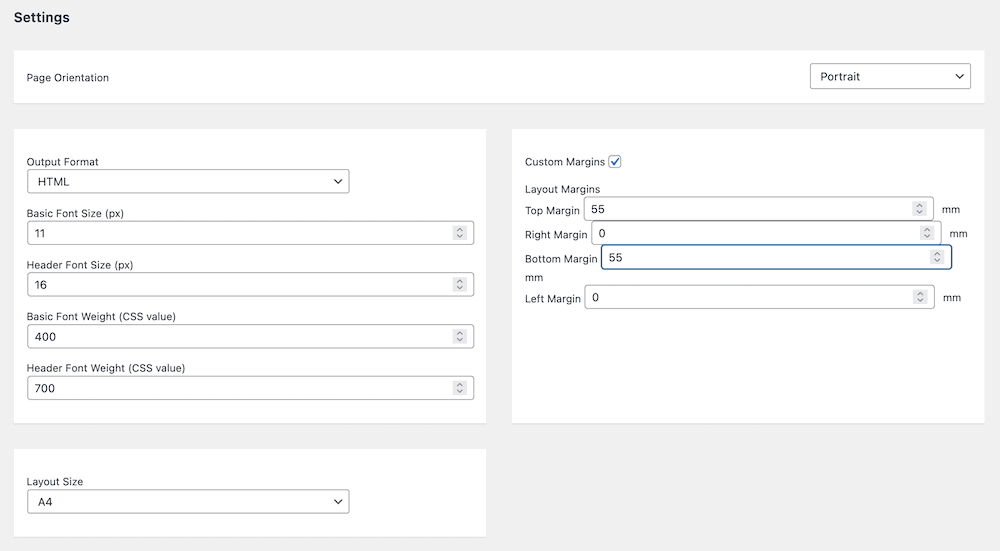
That’s not all. You can also set the typography to your requirements. Adjust font sizes, weights, and choose between HTML or plain text printouts, along with layout orientations and page margins.
If your business requires even more personalization, BizPrint’s advanced options deliver cutting-edge tools that make invoices uniquely yours, even in the most complex workflows. Let’s take a closer look at how advanced customization techniques can support difficult use cases, from multi-location management to dynamic rules and field integrations.
block id=”content_cta”
Advanced customization techniques
BizPrint offers sophisticated options for WooCommerce store owners who need to manage complex invoice requirements across multiple operations.
Auto print custom invoices
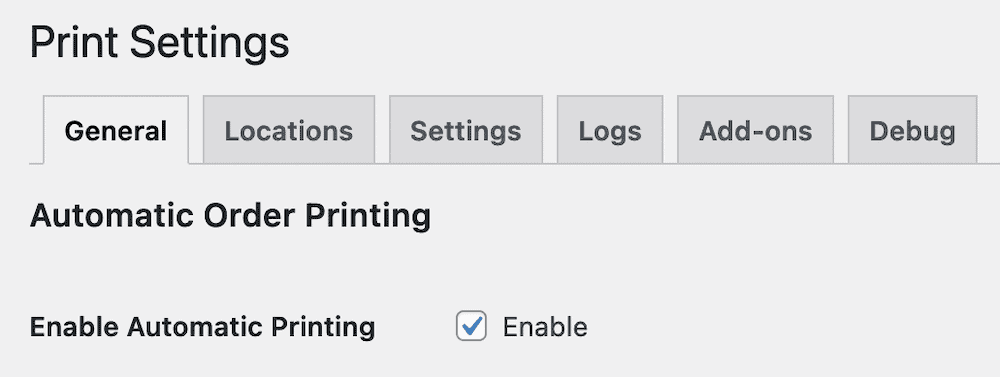
You can enable automatic order printing with one click to prepare hard copies of WooCommerce custom invoice PDFs as and when required. Go to WooCommerce > Print Settings > General tab within WordPress, and save your invoice settings. They are then ready to print automatically, or you can choose to print them manually at a later time. You also have the option to add any notes relevant to the order, such as explaining an additional charge.
Dynamic content rules
BizPrint’s automation features let you create adaptive invoice content based on WooCommerce order data. Through WooCommerce > Print Settings > General tab, you can establish rules that modify invoice content automatically.
For instance, a WooCommerce store might set up rules to:
- Display wholesale pricing terms when the order uses wholesale pricing plugins.
- Show different shipping instructions for local pickup versus delivery orders.
- Include subscription renewal information for WooCommerce Subscription orders.
- Add custom handling notes for variable products.
As an example, when a customer orders a variable product with specific attributes (like size or color), BizPrint automatically includes these variations in a clear format on the invoice. This reduces returns and customer service inquiries about product specifications.
Multi-location invoice management
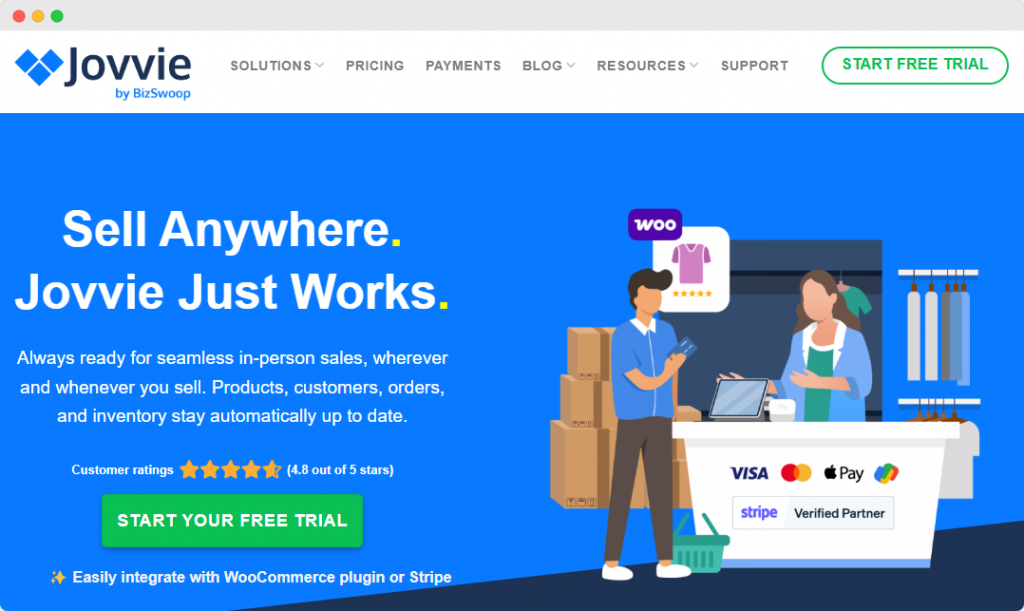
BizPrint integrates with Jovvie, a WooCommerce point of sale system, to handle multi-location invoice printing efficiently. For example, if you run both an online WooCommerce store and a physical retail location, you can set up different invoice templates for each sales channel. Your online orders might include shipping details and tracking information, while your in-store receipts focus on loyalty program points and return policies.
Setting this up takes just minutes: install Jovvie alongside BizPrint, then create your channel-specific templates through WooCommerce > Print Settings. Each template maintains your WooCommerce product data and pricing while adapting the supplementary information for each sales channel.
💡Top tip: Create a base template that pulls your store’s essential information, then customize additional elements for each location. This ensures your product SKUs, prices, and tax calculations remain consistent across all invoices.
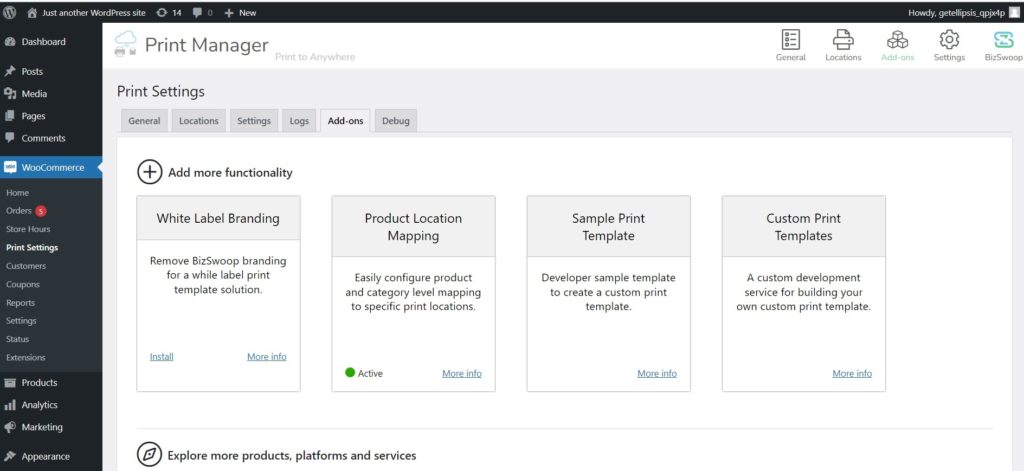
Use the Product Mapping add-on
The Product Mapping add-on plugin from BizSwoop allows you to select products and categories to print only for specific locations. It’s easy to configure. Once you install and activate the add-on, select the location from the ‘Product Mapping’ drop-down menu on the Locations screen.
Custom fields integration
The Product Mapping add-on plugin from BizSwoop enhances how BizPrint handles WooCommerce product categories and variations. Consider a store selling both digital and physical products – you can create distinct invoice formats for each. Once you install and activate the add-on, select the location from the ‘Product Mapping’ drop-down menu on the Locations screen.
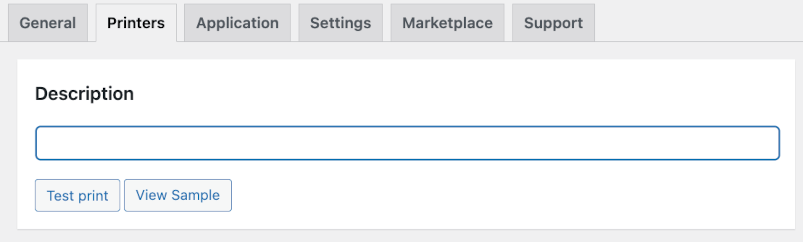
BizPrint’s preview function lets you verify that product variations, custom fields, and WooCommerce metadata appear correctly on your invoices. In your printer specific template click on ‘View Sample’ or ‘Test Print’.
Remember to test your configurations thoroughly before implementing them in your live store. The free WooCommerce Order Test plugin lets you create sample orders with different products, variations, and totals to verify your invoice setup.
These advanced features help you create a professional invoicing system that handles complex WooCommerce store requirements while maintaining efficiency across all sales channels. Whether you manage a simple online store or a complex multi-location operation, BizPrint adapts to your WooCommerce setup without compromising on functionality.
Print WooCommerce Order Receipts, Invoices & Labels
Automatically print from WooCommerce straight to your printer.
Common questions about BizPrint invoice customization
How do I use print template extensions from BizPrint’s Marketplace?
Want to enhance your invoice templates with additional features? BizPrint’s Marketplace offers Print Template Extensions that add new functionality to your invoicing system. Here’s how to install them:
- Purchase your chosen template from BizPrint’s Marketplace.
- Download the plugin ZIP file from your purchase confirmation.
- In your WordPress dashboard, navigate to Plugins > Add New.
- Click the “Upload Plugin” button and select your downloaded ZIP file.
- Click “Install Now” followed by “Activate Plugin”.
Once activated, the new template options automatically appear in all your print receipt templates. You can access these features through WooCommerce > Print Settings.
What can I do with template extensions?
Template extensions add support for third-party plugin fields on your receipts and invoices. Common uses include:
- Adding pickup or delivery times.
- Displaying product add-ons.
- Including additional customer information.
BizPrint offers compatibility with popular WooCommerce plugin developers including:
- IconicWP
- SkyVerge
- Tyche Softwares
- CodeRockz
- Ex-themes
- WP Scripts
Can’t find compatibility with your preferred plugin? You can request a new template through BizPrint’s support.
Are templates included with my subscription?
BizPrint provides 10 templates with all plans. Here’s how template access works:
- Growth plan: Full access to all templates included.
- Basic, Plus, and Pro plans: Core templates included, additional templates available for separate purchase.
Can I create custom templates?
For developers needing advanced customization, BizPrint offers Custom Print Template functionality. This requires coding knowledge but provides complete control over your invoice layout.
With Custom Print Templates, you can:
- Add or remove fields as needed.
- Create compatibility with unsupported plugins.
- Develop unique print-out receipt layouts.
- Access the global $order variable using $order->get_meta.
A note for developers: While you can modify default templates in the /template directory, we recommend creating Custom Print Templates instead. This ensures your modifications won’t be lost during plugin updates and maintains compatibility with future releases.
Need help with custom development? Check BizPrint’s developer documentation for detailed guidance on building plugin compatibility and customizing print-out fields.
Before diving into custom development, review BizPrint’s existing template extensions. The functionality you need might already be available, saving you development time.invoice template
Transform your WooCommerce invoices with BizPrint
Creating professional, customized invoices shouldn’t be complex. BizPrint lets WooCommerce store owners generate invoices, packing lists, and shipping labels in minutes.
“Without your service our processing time would be 5x greater. Amazing!”
Owner of Gyptech, SRL
This is one among many glowing testimonials that BizPrint has received. As a native WooCommerce solution, it has the features you’d expect to be able to create a WooCommerce custom billing invoice with minimal effort, and also print it using your existing infrastructure for added cost-efficiency.
Add-ons and other plugins from BizSwoop allow even more printing customization for your online store and offline operations. BizPrint is straightforward to use, requiring no technical knowledge, which makes it accessible to just about every retailer and restaurant.
Get started in three steps:
- Install BizPrint and connect your printer.
- Choose or customize your invoice template.
- Set up your printing rules.
Starting at $3/month for 100 prints, BizPrint comes with everything you need: Ten core invoice templates, automatic printing capabilities, and support for multiple printers – all seamlessly integrated with your WooCommerce store.
From restaurants needing instant kitchen tickets to warehouses printing packing slips, BizPrint adapts to any business need. Print single orders or full order lists, customize company policies on invoices, and preview everything live before printing. Our native WooCommerce compatibility means you won’t need additional third-party solutions.
Print WooCommerce Order Receipts, Invoices & Labels
Automatically print from WooCommerce straight to your printer.
Get started with BizPrint using one of the flexible pricing plans available and discover how easy it is to set up, create WooCommerce custom invoice PDFs, and print them automatically.