

The Importance of Packing Slips in WooCommerce
Want to process orders faster? Packing slips help speed up order fulfillment and reduce the chance of missing an order or sending out the wrong order.
A system to create WooCommerce packing slip prints and other commercial documents brings benefits like more efficient order processing, a better customer experience, and well-supported bookkeeping and accounting functions.
Question is, can you create and print packing slips from your WooCommerce orders? Ideally, you’d want to customize the packing slips to include all the details your staff needs to quickly and correctly process orders.
Default WooCommerce doesn’t have the functionality to create and print packing slips, necessitating a tool that enables this and makes it easy to do regularly. In this post, we introduce you to BizPrint, the only tool you need to print packing slips in WooCommerce, and show you the steps to create a custom template for a packing slip.
What Standard Packing Slips Should Include

A packing slip is a document that has all the order details necessary for a fulfillment station or warehouse to process and ship products. It is also used in restaurant kitchens and physical stores where the product or service is typically received rather than shipped, or delivered at some future date, such as catering for a business event.
Your staff can confirm they’re shipping the right items by comparing the packing slip with the purchase order. This helps make order processing and shipping more precise and efficient. When customers receive the product they paid for, and not the wrong item, they’re satisfied with your company.
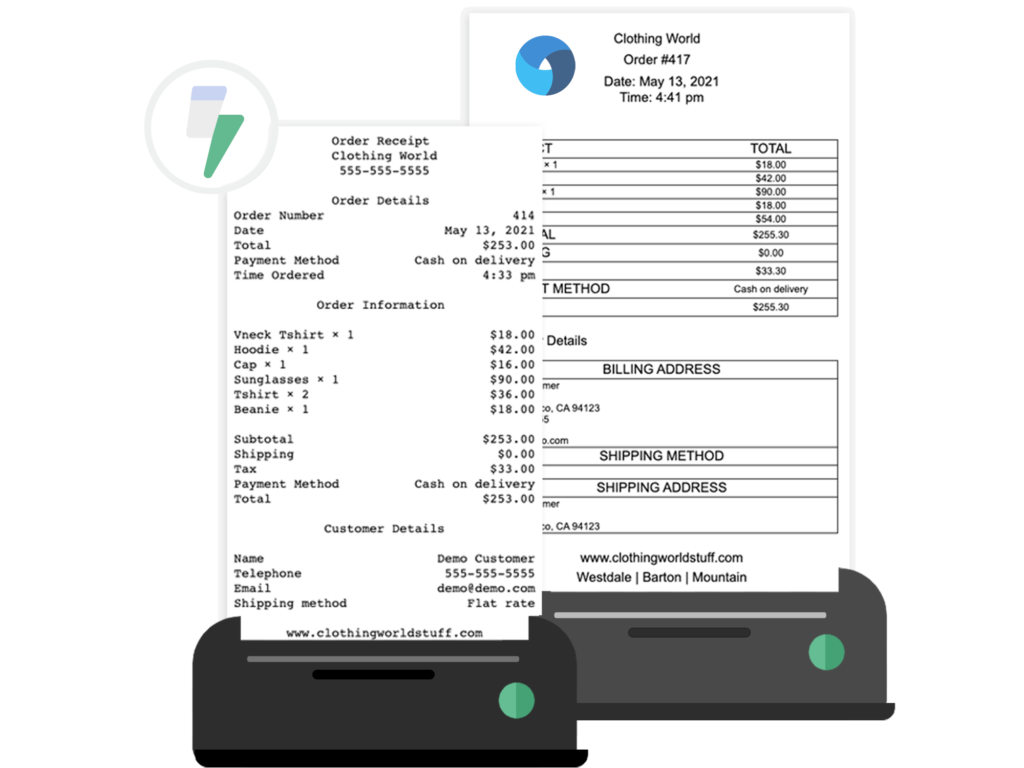
A WooCommerce packing slip print is different from a PDF invoice or receipt. Packing slip hard copies include the items in an order list and serve as a reference for your staff. PDF invoices or receipts are meant for customers, who need them for record-keeping and financial paperwork.
The contents of a packing slip depend on the particular business and product or service. It can include product information like quantity of items, SKU, dimensions, weight, specific customer instructions, and more. These details are easily customizable to your requirements – so long as you have the right solution.
Why use packing slips?
Generating WooCommerce packing slip prints is important to ensure a successful e-commerce or restaurant operation. Specifically, it brings the benefits summarized below.
Faster order processing
Order processing is the picking, packing, and delivery of packed items to a shipping carrier. If you’re an e-commerce store, what happens between the time an order is placed till it reaches the shipper is your responsibility.
A packing slip condenses and presents information in written form for staff to see so they can pick and pack items faster. It has only the information needed for staff to perform their task and leaves out anything else they don’t require, such as the purchase price, VAT, or customer information.
Your restaurant can also create packing slips that are for your kitchen chef’s eyes only. This is a great example of more creative packing slip applications.
Proper records
Packing slips are a useful reference document for not just picking and packing, but also tracking inventory and revenue. While receipts and invoices are the primary documents showing and explaining a company’s transactions, packing slips can supplement them or come in handy when the main documents are unavailable.
Accurate order delivery
We’ve already spoken about this, but it’s worth repeating. Packing slips give clarity to company personnel and remove chances of delivering the wrong order or missing items. In case of any disputes, packing slips can be used to compare the actual delivery and order placed.
Faster order processing times
Packing slips do away with the need to search and identify products in a warehouse or fulfillment center. Staff can locate them using a packing slip template with internal product IDs.
There’s also no need for a separate handover between the sales and order processing departments. Once the order is placed, the packing slip can be automatically printed at the fulfillment station. It significantly reduces the time taken for order processing!
As you’re aware by now, WooCommerce doesn’t offer automatic printing of packing slips out of the box. You need a WooCommerce plugin for this. Given the many benefits of WooCommerce packing slip prints for internal operations, you may be keen to understand which packing slips plugin can get the job done amazingly well.
How to Optimize Packing Slips for Better Branding and Efficiency with BizPrint
A great WooCommerce plugin makes it easy to generate custom packing slips and print them automatically. It scales with your business, allowing you to increase printing jobs with an increase in customer orders. A modern plugin allows you to bulk print simultaneously, in multiple formats, and at multiple locations.
Once the solution is in use, you start depending on it to support your daily operations. This is true for any technology solution. If the plugin keeps crashing or orders fail to print or take longer than expected, it can disrupt processes. So, choosing a plugin with a stable core is paramount as it can be expected to perform reliably and help your order processing run smoothly.
The best plugins for WooCommerce packing slip prints focus intently on both design and user experience. The WordPress plugins are quick and easy to set up.
Best Woocommerce Packing Slip generator – BizPrint
BizPrint is everything you want your packing slip generator and printer to be. You can choose a pre-designed packing print template and customize it to your requirements. Fill the template and set the plugin for auto-printing to create WooCommerce packing slip prints instantly.
Print WooCommerce Order Receipts, Invoices & Labels
Automatically print from WooCommerce straight to your printer.
You can connect to multiple printers at multiple locations at once. It is ideal for restaurant owners that have business websites for order-taking, retail establishments and point-of-sale stations, fulfillment stations, and warehouses.
When used correctly, BizPrint ensures you’ll never miss an order again – it’s just not possible! Let’s understand this with an example.
Say you’re an online store with a warehouse where orders are packed and sent for delivery. Using BizPrint, you can auto-print invoices and configure the plugin to mail the documents directly to customers as soon as they place their orders. Sending order emails to customers quickly gives them ample time to review their orders and initiate payment. You can also auto-print a packing slip with the order and item details, as well as the shipping label at the warehouse fulfillment station.
Such rich features make BizPrint a top plugin for WooCommerce packing slip prints. It has been proved to cut order processing time by 5x for customers. And it’s as user-friendly as you might expect – you don’t need HTML/PHP/CSS or web development knowledge to make the most of the plugin. Simplicity and power in a single package!
Can You Print Packing Slips From WooCommerce? Find Out How with BizPrint
Setting up an automatic printing system using BizPrint is simple and takes less than ten minutes. Say you have a physical store that sells electronic products and you sell in-store and ship domestically. Here’s how you can go about creating your BizPrint account and adding your existing printers.
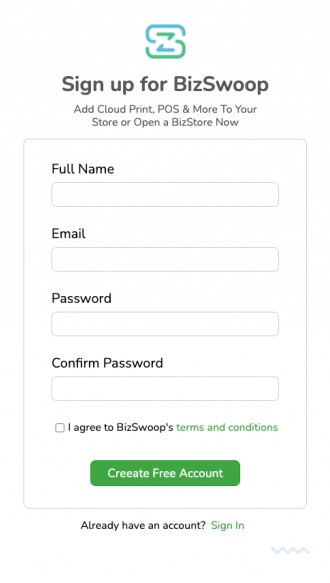
First, you’ll need to set up your BizSwoop Account and choose from one of the flexible pricing plans. There are four available plans, which are:
- The Basics plan: Up to 100 prints a month
- The Plus plan: Up to 10,000 prints a month
- The Pro plan: Up to 100,000 prints a month
- The Growth plan: Unlimited prints per month
These sizes provide a range of options, making BizPrint perfect for all shapes and sizes of businesses. You can even scale your chosen plan up and down whenever you need to, giving you the flexibility to upgrade to more print jobs when you enter a busy season.
Print WooCommerce Order Receipts, Invoices & Labels
Automatically print from WooCommerce straight to your printer.
Create your account and check your email for the activation link. Click on it to activate your BizSwoop account. Then, follow these simple steps to set up auto-printing.
Step 1: Set up a station and find local printers
Login in to your BizSwoop account. You’ll see a dashboard like this.
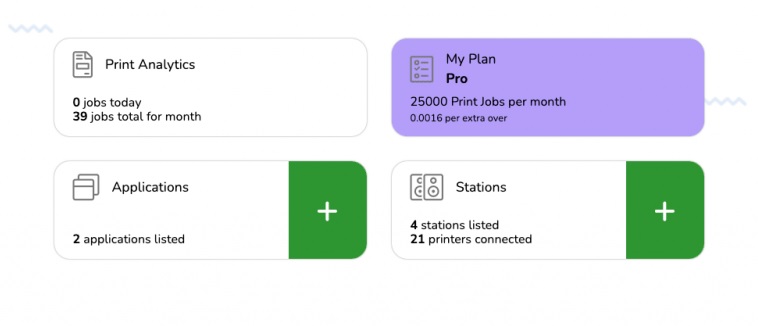
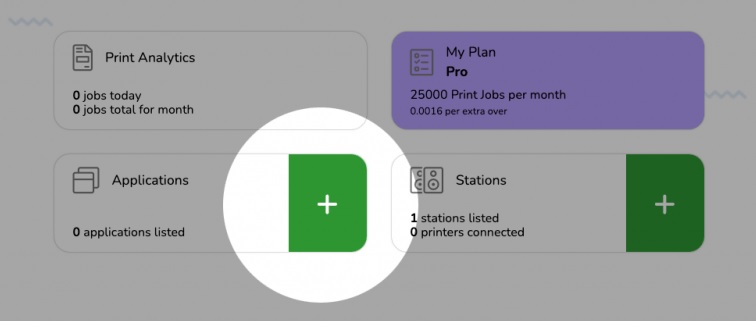
The dashboard gives you an overview of your plan and the number of prints you’ve ordered for the month. From here, you can set up stations and new applications. We’ll focus on adding stations first.
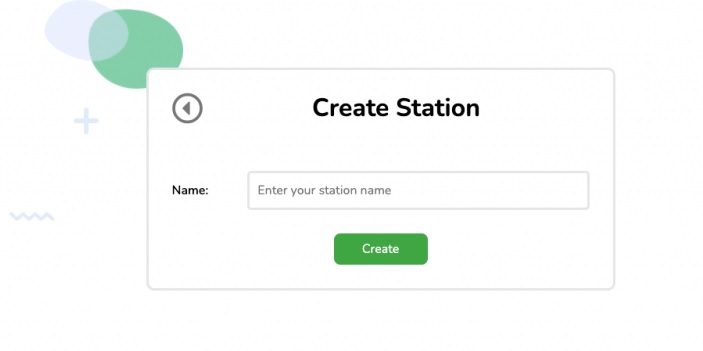
Click the ‘+ next to Stations. Enter a name for the station and hit ‘Create’.
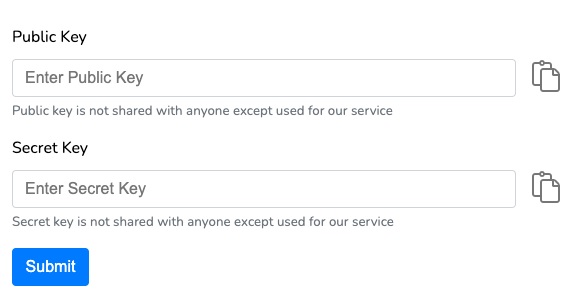
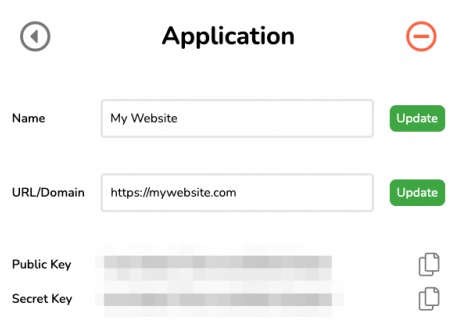
BizPrint will generate public and secret keys for your station, which you can see on the screen. Copy the keys.

You’ll be using them in a bit. For now, download the BizPrint Cloud App for the operating system (OS) you’re using. The app is compatible with Windows, Linux, and Mac OSs.
Install the app. Then run it – the software will ask for the public and secret keys BizPrint generated for you.
You’ll see a message saying the app is successfully connected to BizPrint.
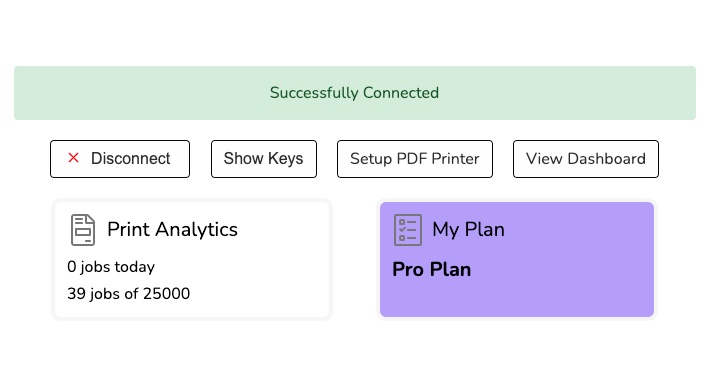
If you need to store a PDF copy of your packing slips, click ‘Set Up PDF Printer’. You can create a new folder or designate a local folder where BizPrint will store PDF versions of your WooCommerce packing slips, receipts, packing lists, pick lists, delivery notes, credit notes, customer notes and invoices.
Most BizPrint users will want to print automatically with a physical printer. The software will automatically detect the printers you’ve connected to your computer. If you have multiple printers, you can select the ones you want to use when configuring your printing jobs. But that comes later. For now, you’ll have to go to your WordPress dashboard.
Step 2: Connect WooCommerce to BizPrint
To connect your WooCommerce to BizPrint, you’ll need the Print Manager plugin (ZIP file here). This plugin sends print jobs from your website to BizPrint for printing.
Go to the BizPrint dashboard and click ‘+’ next to ‘Applications’.
Set a name for the application and insert your WordPress site URL. Hit the ‘Create’ button.
Go to your WordPress dashboard and select the ‘Plugins’ tab. Click ‘Add New’ and search for BizSwoop to find the Print Manager for WooCommerce plugin.
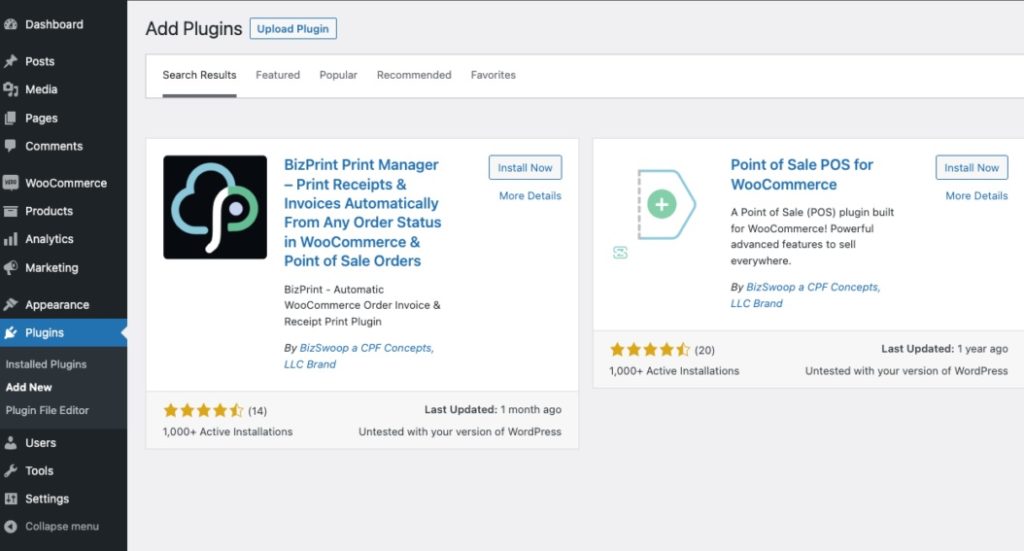
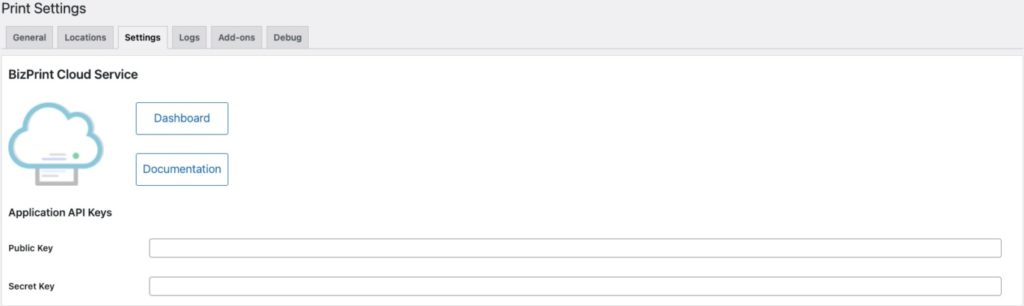
Install and activate the plugin. Next, go to WooCommerce > Print Settings > Settings. Add your public and secret application keys.
The last step is to configure the plugin so it understands what to do with new orders.
Step 3: Configure Print Manager for WooCommerce
Go to WooCommerce > Print Settings > Locations. Click ‘Add New’. Select which of the printers connected to your account that you want to use.
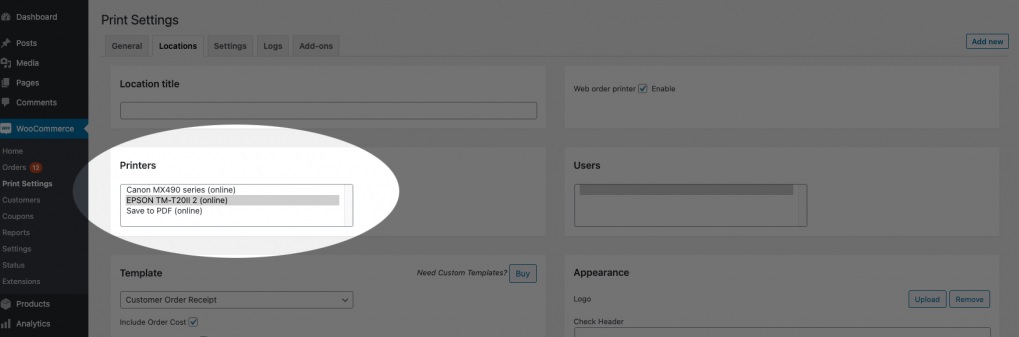
You’re almost done! Scroll down to choose the template you want to use for your packing slips. By default, BizPrint offers three options. But you can purchase additional packing slip or invoice templates.
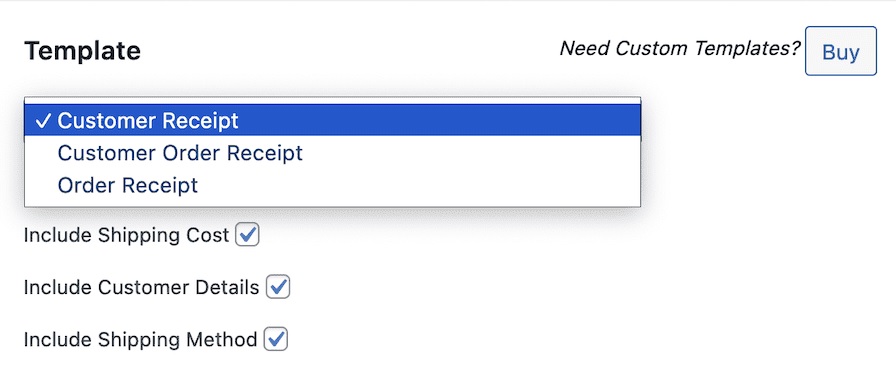
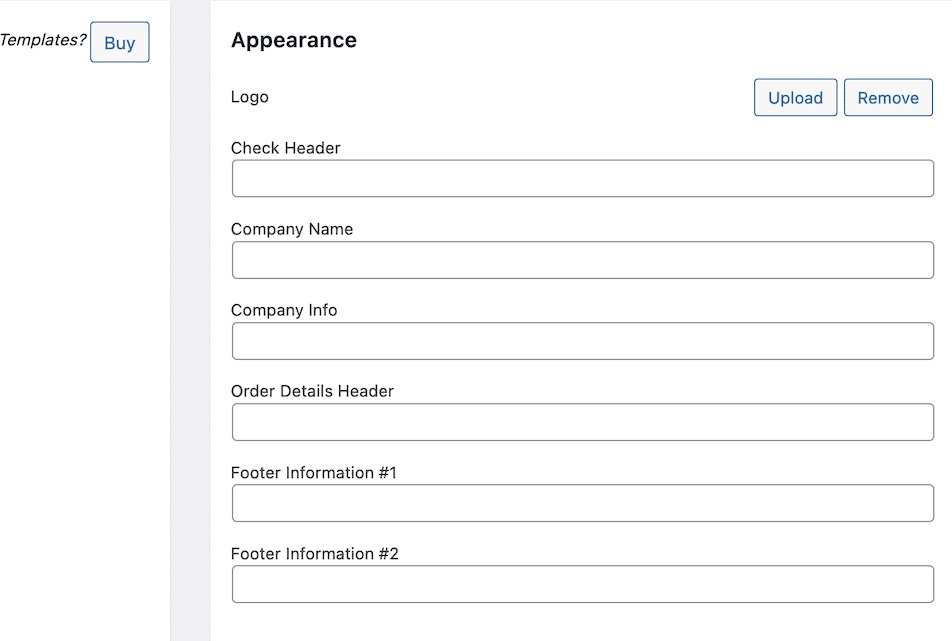
You can add custom information to each template. You can add a header, your company logo, your return policy, choose your preferred date format, and if you’re creating an invoice, add sequential invoice numbers.
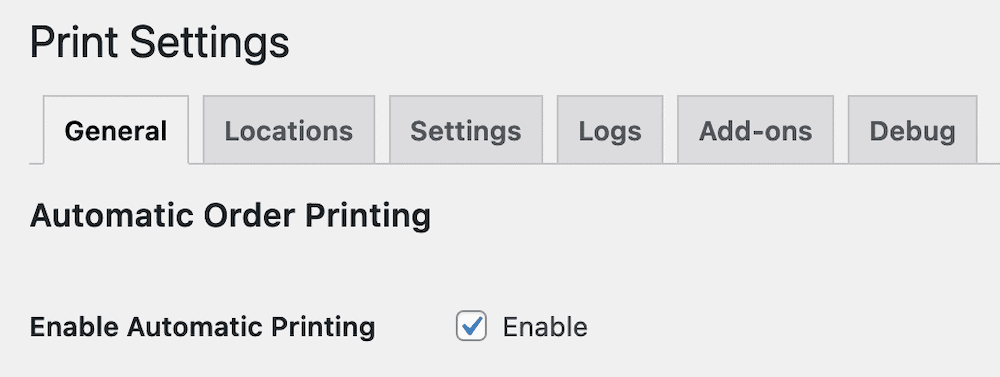
After configuring your packing slip or invoice settings, navigate to WooCommerce > Print Settings > General. From here, you can trigger automatic printing and select the order statuses that should trigger new print jobs.
You have the option to trigger jobs manually. Go to the orders page, at WooCommerce > Orders and select the icons under the ‘Print’ column for each order. On the order details page, you can choose bulk actions or change the status of orders from the dropdown menu.

Add barcode
If you want to add a barcode to your packing slip, you can use a separate barcode plugin like the one here. It stores the metadata in WooCommerce, so BizPrint is able to fetch it and add the barcode when an order is printed.
Alternatively, the BizPrint team can help you send the barcode metadata required for auto-printing through an API. For more information, get in touch with our dedicated support team.
Product Mapping

The Product Mapping add-on allows you to send only specific WooCommerce categories or products in WooCommerce to specific printer locations. Say your WooCommerce store has two fulfillment locations, one for apparel and another for shoes. You can have one printer only print packing slips related to apparel at one station, and another printer generate only WooCommerce packing slip prints for shoes at a different fulfillment center.
So, if a customer places an order for two skirts and a pair of tennis shoes, the printer for apparel will list only the two skirts as items, while you’ll only see one pair of shoes listed for the printer assigned to footwear. Both printers will receive their individual orders for printing immediately.
Automate printing for packing slips and drive faster fulfillment
WooCommerce packing slip prints are a paper trail of what should be in the shipment or catering meal order. They make it difficult to miss items for delivery, and help ensure that you meet customers’ expectations consistently.
While WooCommerce lacks a built-in option to print packing slips, BizPrint fills this hole for retailers, restaurants, and warehouse and fulfillment staff. The native WooCommerce solution is perfect for auto printing packing slips and offers you control over where the packing slips are sent and printed, and for different WooCommerce categories and products. It works with your existing printers and is a one-stop printing solution for all your retail, restaurant or fulfillment locations.
Print WooCommerce Order Receipts, Invoices & Labels
Automatically print from WooCommerce straight to your printer.
Get started with BizPrint to experience the benefits of this comprehensive solution over other WooCommerce extensions or plugins offering non-automated printing. Choose a pricing plan that fits your unique needs and scale up or down to meet the demands of your business.