Looking to save time and effort while shipping your WooCommerce orders and make your store more efficient? Shipping labels are a vital aspect of all eCommerce businesses. They contain all essential information about your online orders, ensuring deliveries reach your customers successfully – in good condition and on time.
Manually printing shipping labels works for small WooCommerce sites that take a limited number of orders. Yet as your volume of online sales grows, printing each shipping label one by one is a substantial time killer for your company’s order fulfillment staff.
To regain this time and become more efficient, consider bulk printing shipping labels for your WooCommerce store. And if you’re not sure how, don’t worry! It is incredibly straightforward, and we walk you through all the steps of the printing process in this post.
Why Bulk Print WooCommerce Shipping Labels?
It is possible to manually generate individual shipping labels for every order on your WooCommerce site. This is an acceptable method for small stores with a low order volume. Each label only takes a few minutes to print, and your deliveries can be sent out to customers relatively quickly.
But as your online presence grows and sales increase in volume, manually printing labels on an order-by-order basis becomes problematic. What took one minute for one order takes hours when you’re processing multiple orders every day! Printing tens, hundreds, or even thousands of shipping labels daily is a hugely time-consuming task, cutting into valuable time that could be spent elsewhere.
WooCommerce stores that bulk print shipping labels instantly become more efficient. Orders can be fulfilled more quickly with less chance of human error, leading to a better customer experience. Staff time is also freed up, and their efforts can be channeled into growing your eCommerce business. And the bigger your store gets, the more crucial bulk printing becomes.
How Do You Bulk Print Shipping Labels for Your WooCommerce Store?
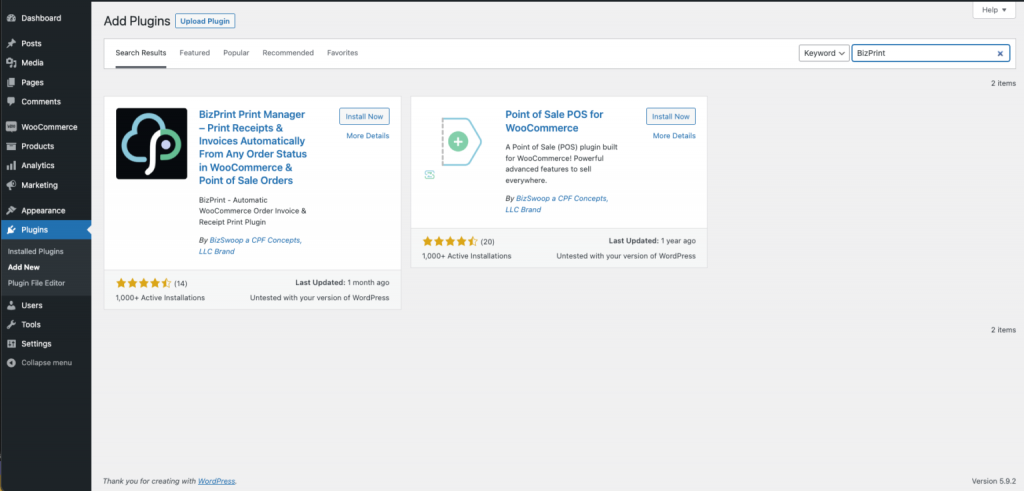
Unsure how to bulk print shipping labels for your WooCommerce store? WooCommerce is an excellent WordPress plugin that lets you effortlessly turn your website into an online store. However, it is not set up for creating and printing shipping labels. For this, you require a separate printing and shipping plugin: BizPrint.
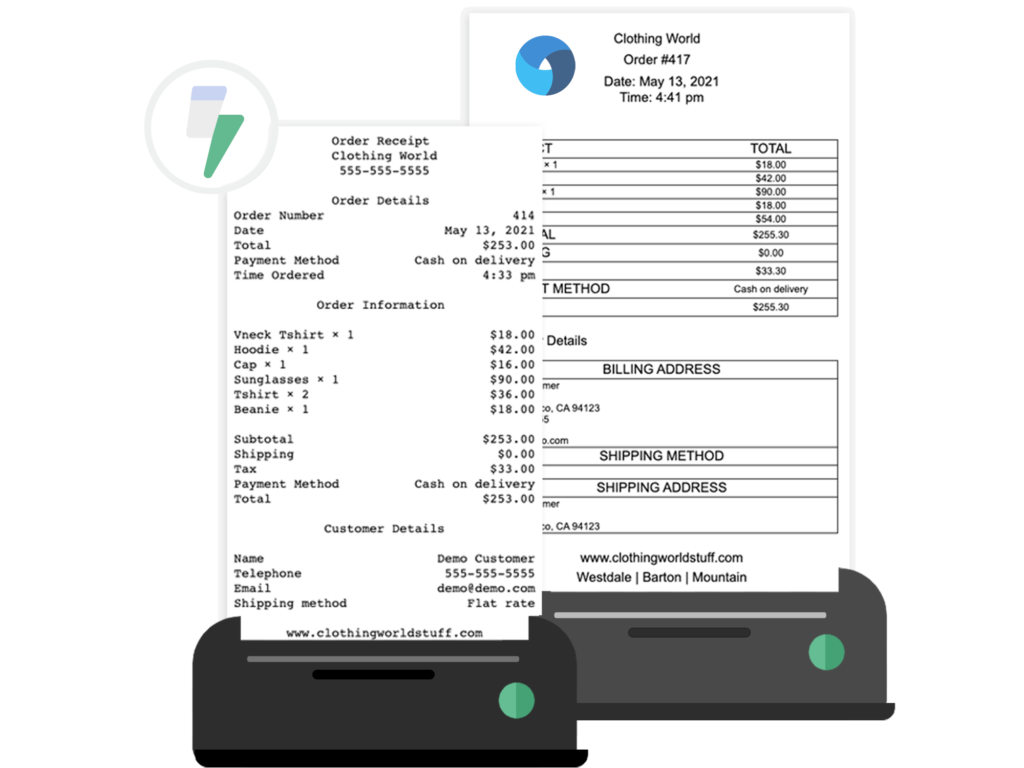
BizPrint is a comprehensive solution for efficiently generating and printing shipping labels, receipts, invoices, packing slips, pick lists, and more. Here is a closer look at some of the main reasons why this could be the printing solution you’ve been searching for.
Automatic Printing

BizPrint enables you to effortlessly print shipping labels and all other major order fulfillment documents for your WooCommerce store, enhanced further by its automatic printing function. You can automatically print all orders directly to a pre-assigned location, helping streamline the printing process and improve the efficiency of your workforce.
The applications of this automatic printing function are vast, depending on the needs of your business. From an eCommerce perspective, auto-printing order information and generating shipping labels when customers checkout their baskets improve business operations and contribute to a better customer experience. For physical WooCommerce stores, you can also use this function to produce hard-copy receipts at the point of sale.
Product Mapping
BizPrint’s dedicated mapping addons enable you to configure automatic printing based on product categories, shipping zones, or shipping methods. You can choose the printing location based on these filtering options. For example, shipping labels can be printed at the closest order fulfillment center, or all orders for each courier can be printed at the same location to consolidate pick-ups.
This product mapping feature further aids companies using WooCommerce in streamlining their label printing processes and keeping shipping rates low.
Customizable Templates

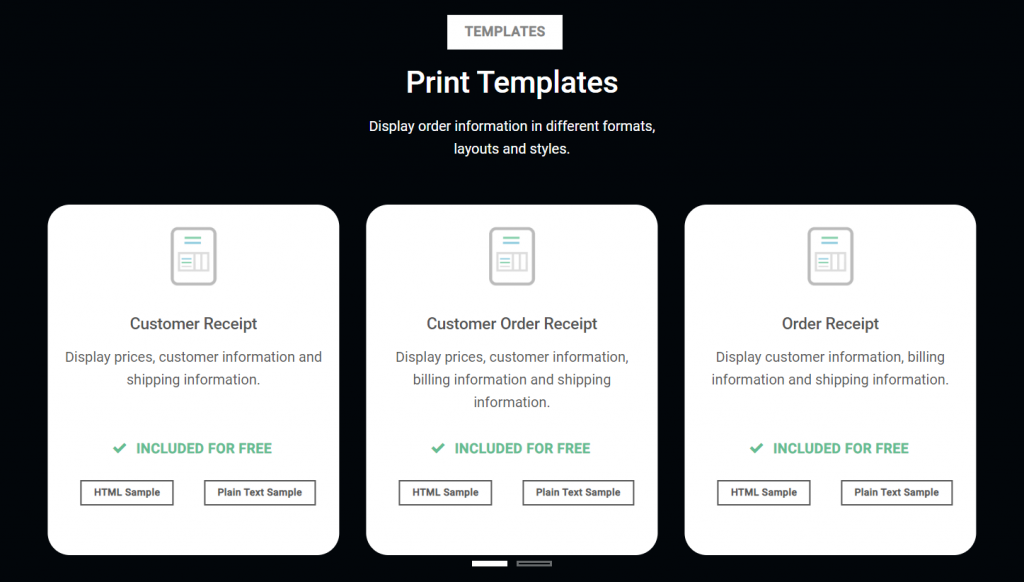
BizPrint comes with various customizable templates that can be adapted to meet your business requirements to ensure they contain all necessary information. You can choose from three basic templates as shown above. You can add branding and logos to your label designs and, using WordPress hooks and filters, you can even add courier-specific barcodes to your shipping label templates.
For a more bespoke solution, BizPrint also offers a template creation service you can access by clicking the “Buy” button inside the plugin. You have complete control over the design of your shipping labels, ensuring all specific business needs are catered for. Personalized shipping labels help establish your eCommerce business as professional and reinforce your brand identity.
Printer Compatibility
BizPrint integrates with all printer models, so you don’t need to purchase any new printing equipment when bulk printing your WooCommerce shipping labels. The plugin also works with all major thermal printer brands such as Epson, Star, and Zebra. Thermal printing is the accepted industry standard for producing shipping labels on a large scale, making BizPrint a clear choice for eCommerce sites.
Guide to Bulk Printing Shipping Labels Using BizPrint
BizPrint is a firm choice for WooCommerce businesses needing to bulk print shipping labels and offer more efficient service. And thankfully, printing labels using this leading WordPress plugin couldn’t be any easier!
Follow the four steps below and start effortlessly printing your eCommerce shipping labels on a large scale and get access to your free prints.
1. Create a BizSwoop Account
To use BizPrint, you need first to create a BizSwoop account. Account creation is free and only takes a few seconds. Simply enter your full name and email address, set up your password, and agree to BizSwoop’s terms and conditions. Click the “Create Free Account” button to confirm account registration and gain access to BizPrint.

After registering for an account, you will receive an activation email. Click the link and login into your account, then begin setting up your printers.
2. Connect Your Printers and Website
Once registered, you need to connect your printers to your BizSwoop account. To do this, head to your account dashboard by clicking the green “+” button next to the “Stations” tab and following the on-screen instructions. You can add as many printers as you need and name each station so as to easily identify which you’re selecting for different print jobs.

The BizPrint plugin works by connecting to a cloud-based application and an app that connects to your local printer, so you’ll need to download the app to your chosen Mac, Windows or Linux device. Launch the app and click “connect” to link your printers. You need to enter the public and secret keys for the printing stations you previously created, registering them with your BizPrint account. All registered printers should show in the BizPrint dashboard.

You now need to connect the application to your WooCommerce site. From the BizPrint dashboard, click the + next to the applications tab and enter your WordPress URL.

You can then head to your eCommerce site and install the Print Manager plugin, connecting your printers and website together. This quick-start guide walks you through the process in more detail if you need extra information.

3. Create Your Shipping Label Templates

With everything set up, you can start designing your WooCommerce customized shipping labels to print in bulk. There are various BizPrint label templates to choose between, so select the option that best suits your business requirements. These templates act as a base that you can edit as required.
Make sure you fill in all the customizable fields with the relevant information. This might include parcel tracking numbers, company information, and product stock-keeping units (SKUs). The destination address and shipping class should also be included. Using the templates, you can be sure you’ve not forgotten any vital information needed for quick and smooth delivery.
BizPrint also enables barcodes to be added to all shipping labels using WordPress hooks and fillers. Barcodes are crucial for large online retailers, helping to keep track of hundreds or thousands of parcels easily and allowing the generation of shipping labels for specific courier services.
To include a barcode on your shipping labels, add custom code to your template or have a bespoke template built for you by BizPrint as per the developer documentation. For example, to insert a barcode after the shipping information but before the footer, you’d use the “After Shipping Details” hooks:
Zprinttemplatescustomer-htmlafterShippingDetails, passed argument: int $order_id
Zprinttemplatescustomer-plainafterShippingDetails, passed argument: int $order_id
Zprinttemplatesdetails-htmlafterShippingDetails, passed argument: int $order_id
Zprinttemplatesdetails-plainafterShippingDetails, passed argument: int $order_id
Zprinttemplatesorder-htmlafterShippingDetails, passed argument: int $order_id
Zprinttemplatesorder-plainafterShippingDetails, passed argument: int $order_id
4. Print Your Shipping Labels in Bulk
Once you are happy with your shipping labels, you can start printing! You can print individual labels and other documents as required, but BizPrint makes it easy to print all shipping labels at once to shorten the manual printing process.
Bulk printing with BizPrint is exceptionally straightforward. To bulk print your shipping labels for your WooCommerce site, follow these three easy steps:
1. Head to your WooCommerce orders page and select the orders you need labels printing for
2. Select the “Print” option in the drop-down menu in the bulk actions list
3. Click on your preferred printing station to instantly send all labels to the printer
We’ve already established bulk printing is beneficial for eCommerce businesses. But BizPrint also offers an even more efficient printing method: auto-printing. This is a more time-effective alternative to bulk printing your WooCommerce shipping labels, as orders are printed in real-time. Automation means no staff intervention is required whatsoever and leaves no room for human error.
It is up to you whether you want to bulk print or auto-print WooCommerce shipping labels, but in case you’re favoring the latter, here is how to set up BizPrint’s automatic printing function:
1. Tick “Enable Automatic Printing” in your WooCommerce print settings

2. Choose the order status at which you want your labels to print, such as “Completed”.
3. When your orders reach this predetermined status, your shipping labels are automatically sent to your connected printing station.
If you want to set a custom order status to trigger automatic printing, you can do so easily with Flow Notify, also developed by BizSwoop. Adding custom order statuses can ensure labels are printed at exactly the stage you need them in your order fulfillment process. For example, you might want to hold off printing labels until all inventory for the shipment has been confirmed, picked, and packaged up for delivery. In this case, you could add a custom ‘ready for shipping’ status, and configure BizPrint to auto-print when your orders reach that status.
Aside from creating custom order statuses, Flow Notify also allows you to automatically send notifications and emails to customers at pre-determined stages of the order fulfillment process. Doing this is a fantastic way to keep your customers in the loop about their order status and boost their satisfaction, so they keep coming back. As sister plugins, BizPrint and Flow Notify are seamlessly compatible.
Bulk Print Your WooCommerce Shipping Labels with BizPrint
Shipping labels are crucial within the order fulfillment process, helping you keep track of parcels and ensuring your customers receive their deliveries on time. For larger WooCommerce companies, bulk printing these labels is a time-effective solution that helps your online store become more efficient.
Any eCommerce site looking to bulk print labels can do so with BizPrint. This WooCommerce shipping plugin is the best solution for online store owners, offering advanced compatibility, product mapping functionalities, and customizable label templates. Its auto-printing function is arguably even more effective than bulk printing and removes the need for manual label printing entirely – ensuring no orders are ever missed!
BizPrint offers scalable pricing plans to suit eCommerce sites of all sizes. The basics package permits up to 100 prints, perfect for smaller stores, whereas the most extensive print plan has no printing limit. This means it can grow alongside your business and help facilitate growth each step of the way. Register for BizPrint today to set your WooCommerce business up for success.


