

Getting shipping right on your online store matters a lot. Customers want clear shipping costs and delivery options before they complete their purchase, and WooCommerce shipping zones help you deliver that.
If you’ve struggled with setting up shipping for your WooCommerce store, don’t worry. Lots of store owners find it tricky to configure shipping zones that show accurate rates based on where their customers are located.
We’re going to skip the technical jargon and show you how to set up shipping zones that work for your business. You’ll learn how to create zones step-by-step, add different shipping methods, use shipping classes for special products, and see how tools like BizPrint can make your entire fulfillment process smoother.
How to set up shipping zones in WooCommerce
Shipping zones are simply geographical areas where you offer specific shipping options and rates. They’re essentially your way of telling WooCommerce: “When a customer from California shops in my store, offer them free shipping, but when someone from Canada orders, charge them a flat rate of $15.”
Before we get into the setup, here are three important things to understand about shipping zones:
- Customers only see shipping options that match where they’re located.
- WooCommerce checks zones in order (from top to bottom of your list).
- A customer can only match with one shipping zone.
Creating a new shipping zone
- Log in to your WordPress dashboard.
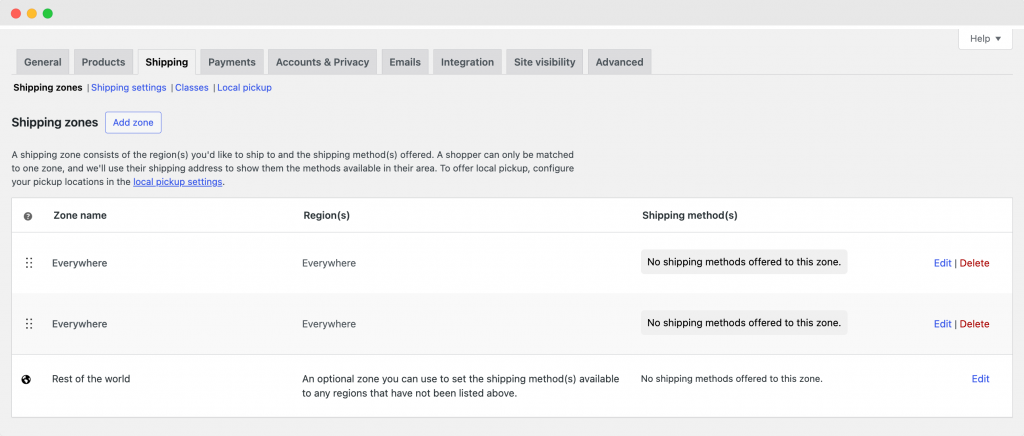
- Go to WooCommerce > Settings > Shipping > Shipping zones.

- Click Add zone at the top of the page.

- Give your zone a clear name (like “Local Delivery” or “United States”).
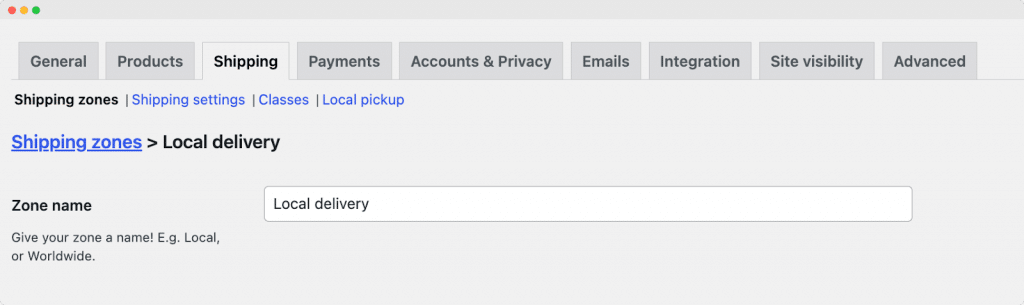
- Click Save changes.
Configuring your shipping zone
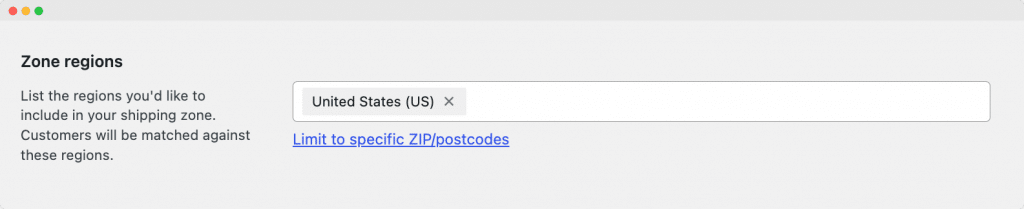
Now that you’ve created a zone, we need to define which geographical areas it includes:
- In the Zone regions section, select the countries, states, or continents this zone applies to.
- If you want to get more specific, select Limit to specific zip/postcodes. Enter postal codes one per line (you can use wildcards like “902*” to match all codes starting with 902).
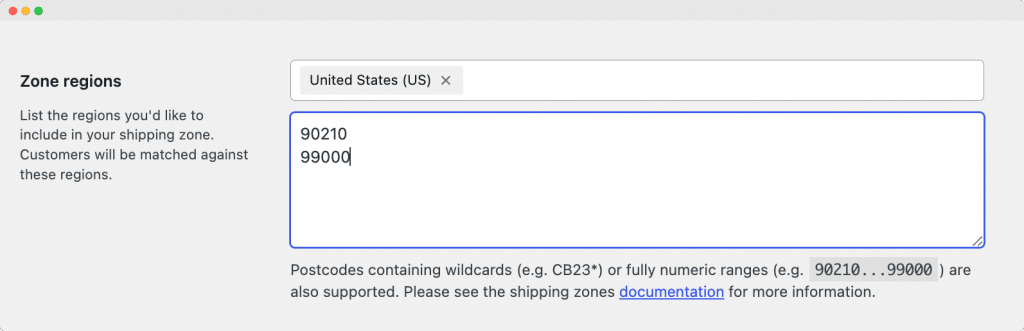
- Click Save changes.
Remember, you can make zones as broad or specific as you need. You might have one zone for your entire country and another just for your local area where you offer special delivery options.
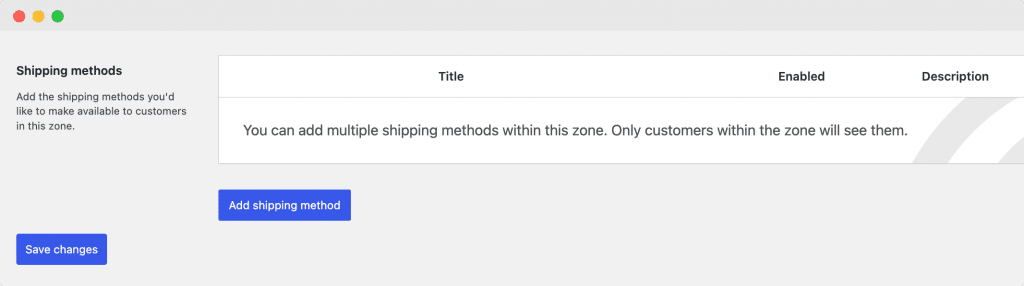
Adding shipping methods to your zone
A shipping zone without shipping methods doesn’t do much! Here’s how to add them:
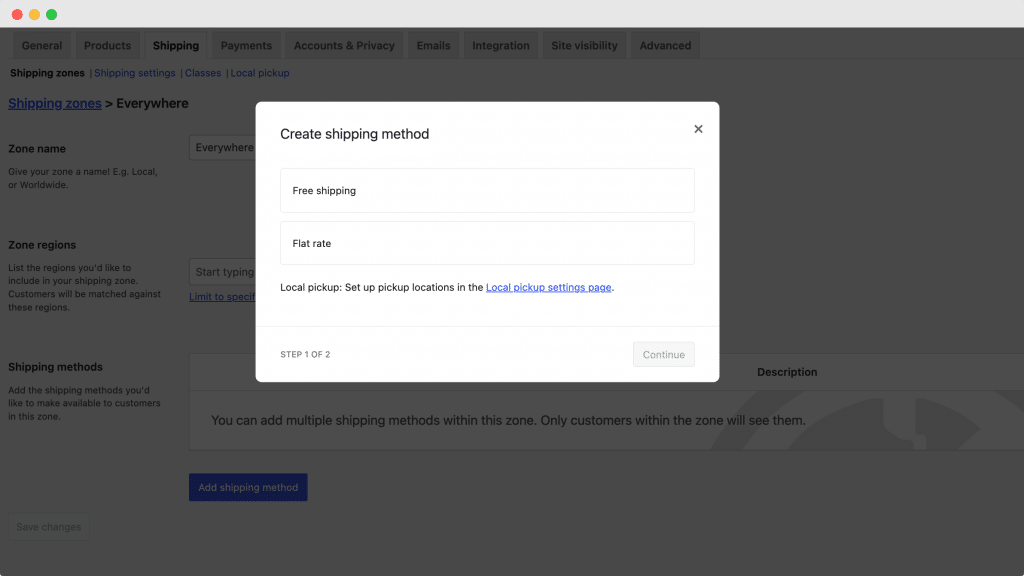
- Click the Add shipping method button.
- Choose from the available options (WooCommerce includes Flat rate, Free shipping, and Local pickup).
- Set up the details for each method (costs, requirements, etc.).
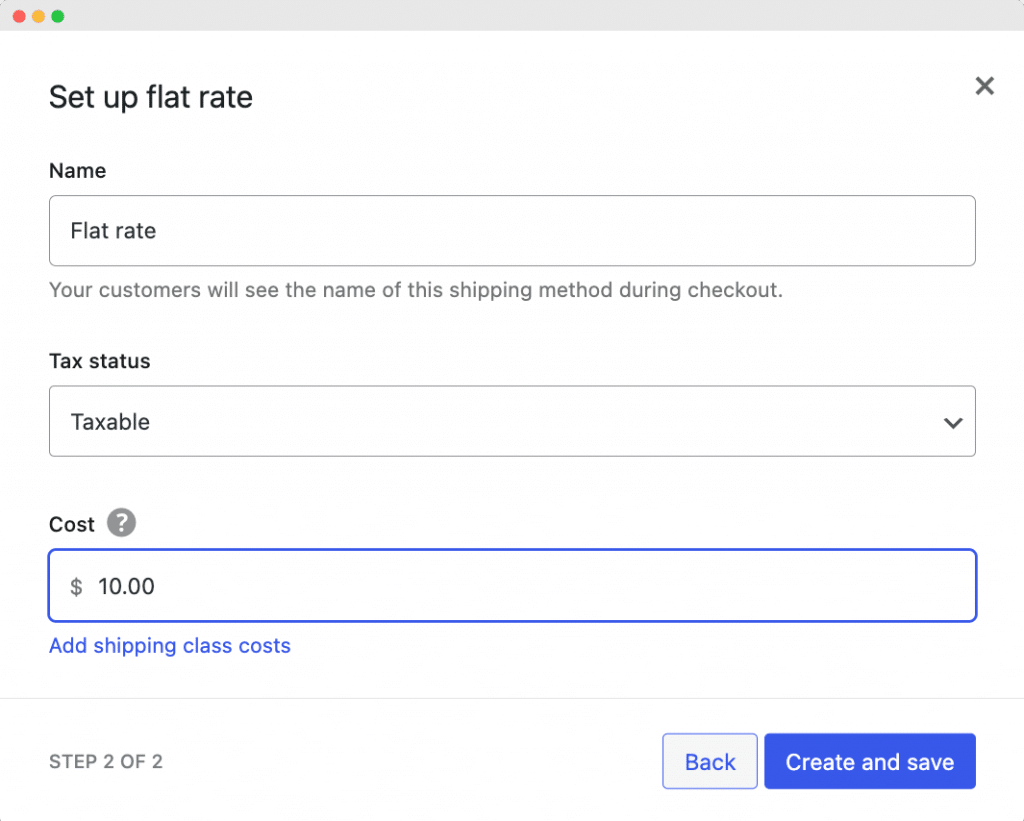
- Click Create and save.
You can add multiple shipping methods to a single zone, giving your customers options to choose from at checkout.
And here’s a tip: Pay attention to the order of your shipping zones! WooCommerce matches customers to zones from top to bottom, so put your most specific zones (like individual zip codes) at the top and more general zones (like entire countries) below them.
WooCommerce also comes with a “rest of the world” shipping zone. This catches any locations that don’t match your custom zones. You can add shipping methods here or leave it empty if you don’t ship to certain regions.
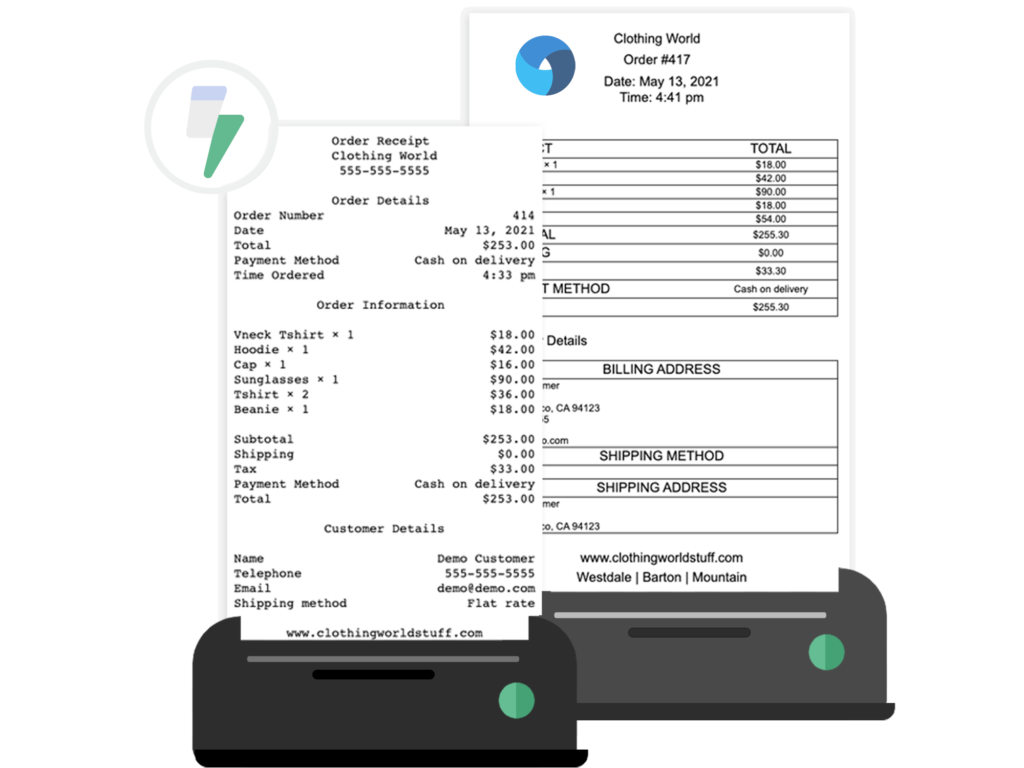
Print WooCommerce Order Receipts, Invoices & Labels
Automatically print from WooCommerce straight to your printer.
Optimizing WooCommerce shipping with shipping classes
Sometimes flat shipping rates don’t tell the whole story. What if you sell both small items like jewelry and bulky items like furniture? That’s where shipping classes come in handy.
Shipping classes let you group similar products together and apply different shipping rates to each group. For example, you could create classes for “Heavy Items,” “Standard Products,” and “Small Items,” then charge different shipping rates for each.
Here’s how to set up shipping classes in WooCommerce:
- Go to WooCommerce > Settings > Shipping > Classes.
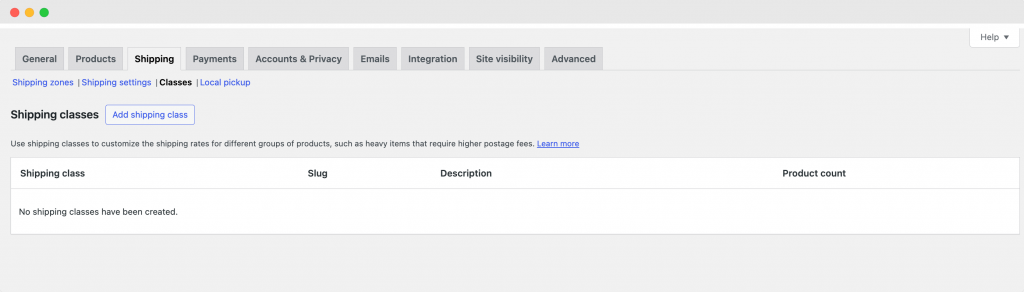
- Click the Add shipping class button and fill in these details:
- Name: What you’ll call this class (e.g., “Heavy Items”).
- Slug: Leave blank for automatic generation or add your own.
- Description: A brief explanation of what this class is for.
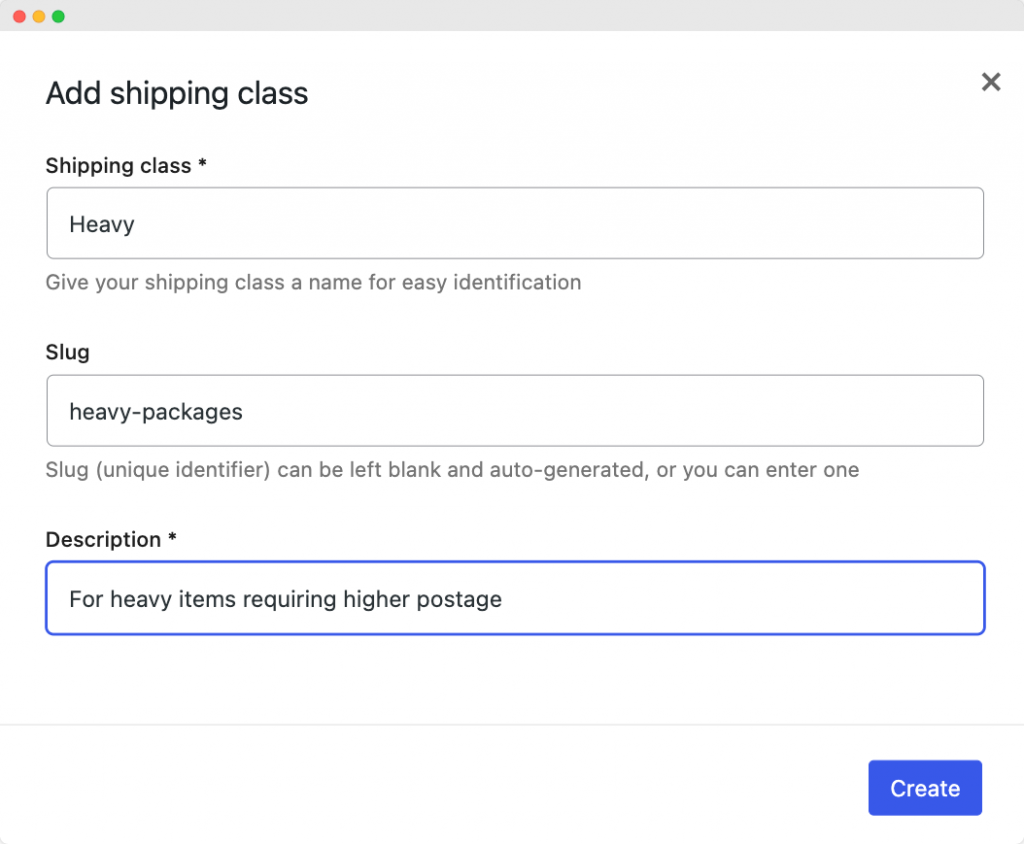
- Click Create.
Repeat this process for each class you need. Common shipping classes include “Heavy,” “Fragile,” “Oversized,” or “Free Shipping.”
Once you’ve created your shipping classes, you’ll need to assign them to relevant products:
- Go to WooCommerce > Products.
- Edit the product you want to assign a shipping class to.
- Scroll down to the Shipping tab.
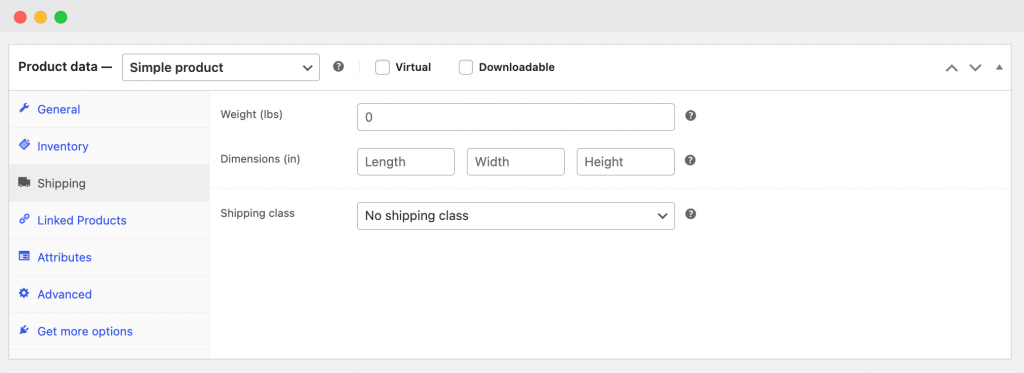
- Select your shipping class from the dropdown menu.

- Save your changes.
Now comes the most important part – connecting your shipping classes to actual shipping costs:
- Go to WooCommerce > Settings > Shipping > Shipping Zones.
- Edit the zone where you want to apply these class-based rates. Click on a shipping method (Flat Rate works best with shipping classes).
- You’ll see cost fields for each shipping class you’ve created. Enter the costs for each shipping class.
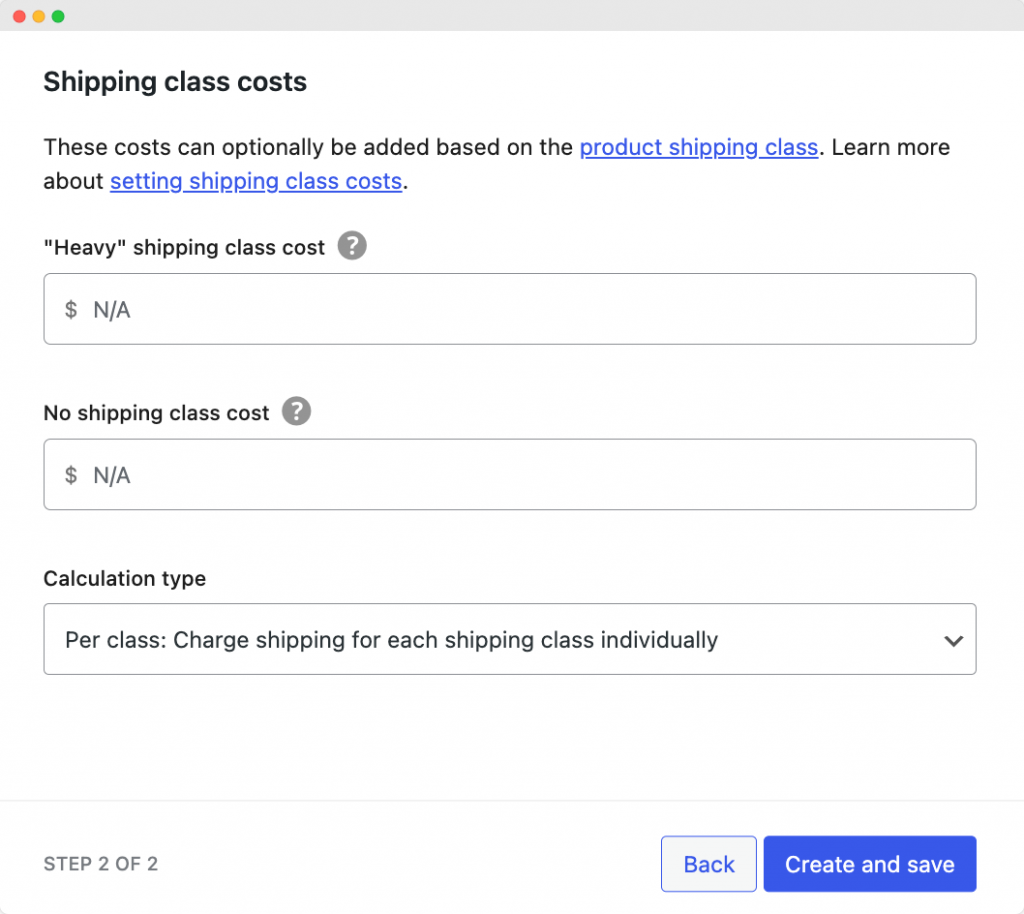
- Choose a calculation type:
- Per Class: Charges shipping for each class separately (adds them up).
- Per Order: Only charges for the most expensive shipping class in the cart.
- Save your changes.
For example, you could charge $5 for standard items, $15 for heavy items, and $0 for items in a “Free Shipping” class. When a customer buys products from multiple classes, WooCommerce will calculate the total based on your settings.
Enhancing WooCommerce shipping zones with BizPrint integration
Well-configured shipping zones and classes handle the customer-facing side of your shipping process, but what about the operational side? BizPrint offers a solid solution for WooCommerce stores looking to optimize their order fulfillment workflow after checkout.
BizPrint is a WooCommerce printing solution that automates document generation and printing based on your store’s order workflow. It works effortlessly with the shipping zones and methods you’ve already configured, creating a bridge between your online store and your physical fulfillment process.
Here’s a look at its features that support streamlined order fulfillment:
Automatic printing triggered by order status
BizPrint’s automatic printing feature eliminates manual intervention when processing orders. The system can generate and print documents automatically when an order status changes:
- When a new order comes in, print a receipt in your office.
- When an order status changes to “Processing,” print a packing slip in your warehouse.
- When an order is marked “Completed,” print a shipping label at your shipping station.
This automation saves your team valuable time and reduces the risk of orders being missed or delayed during busy periods.
Shipping zone and method mapping
BizPrint’s intelligent mapping capabilities work perfectly with WooCommerce shipping zones. You can configure BizPrint to route documents to different printers based on shipping zones and methods.
Orders using your “Local Delivery” shipping method could print to your in-house delivery team’s printer, while orders from international zones might print at a dedicated international shipping desk.
This mapping ensures that orders are automatically sent to the right team members based on shipping requirements, reducing confusion and improving efficiency. The system essentially “knows” which printer should receive which document based on how and where the order needs to be shipped.
Support for multiple customizable document types
BizPrint supports various document types essential for efficient order fulfillment. From receipts with your store branding to detailed packing slips, shipping labels, pick lists, and invoices – each document can be fully customized with your branding and specific information fields.
The ability to generate different document types for different stages of the fulfillment process helps ensure that your team always has the right information in the right format. A packing slip might emphasize product details and quantities, while a shipping label focuses on destination information and carrier requirements.
Streamline your shipping workflow with BizPrint
Setting up shipping zones helps your customers see the right shipping options and costs at checkout. But processing those orders quickly after purchase is where many store owners hit a bottleneck.
BizPrint works with your WooCommerce store to print order documents automatically. When an order comes in, BizPrint can print receipts, packing slips, and shipping labels without you clicking a single button. The system even sends different documents to different printers based on your shipping zones.
Store owners who use BizPrint spend less time on paperwork and more time fulfilling orders. Your team grabs the printed documents and gets to work – no more searching through the admin panel or manually printing each order.
BizPrint offers 25 free prints for new users, so you can test it with your own store. Give it a try and see how it fits into your order fulfillment process!
Print WooCommerce Order Receipts, Invoices & Labels
Automatically print from WooCommerce straight to your printer.