

Adding VAT to WooCommerce invoices presents challenges when using just the basic tax settings. This guide shows you how to set up VAT properly, create compliant invoices, and automate the process with specialized plugins.
This guide covers:
- Setting up VAT in WooCommerce.
- Creating compliant tax invoices.
- Automating invoice management.
- Essential tools for international businesses.
We’ll explain each step clearly, from basic configuration to complete automation, helping you meet all tax requirements efficiently.
What is a WooCommerce VAT invoice?
A WooCommerce VAT invoice is a tax-compliant document automatically generated by your WooCommerce store when selling to customers in regions that use Value Added Tax (VAT). It’s a legally required document that shows how VAT was calculated and collected on a sale.
Unlike U.S. sales tax, which only applies at the final sale, VAT is a consumption tax that applies at each stage of production and distribution:
- VAT accumulates throughout the supply chain.
- The end customer pays the total VAT amount.
- As of 2025, over 175 countries use VAT systems.
While the U.S. uses state-level sales taxes, you’ll need to handle VAT if you:
- Sell to customers in VAT-using countries.
- Ship products to the EU or UK.
- Run a B2B store with international customers.
A proper VAT invoice must include:
- Your company’s VAT registration number.
- Applied tax rates.
- Pre-tax amount.
- VAT amount.
- Total with VAT.
- Customer’s VAT number (for B2B transactions).
When to add VAT fields in WooCommerce
If you need to add VAT and/or other taxes, extra fields or custom tax fields will make your job easy. Here’s a look at some situations where custom fields for WooCommerce taxes are useful:
- You want to charge different taxes for different products or services.
- You ship products internationally and must account for different tax rates in different countries.
- Your product comes under a temporary VAT rate or relief.
- Your products are VAT exempt, so you don’t want to include the default tax that you’d normally charge.
- You want to create your own tax rates instead of using the default ones.
If you anticipate charging VAT in the future, as you expand or grow your business, knowledge of creating a WooCommerce VAT invoice will no doubt be helpful. You’ll be able to generate PDFs of VAT-compliance invoices in bulk and send them out in a timely manner to avoid the negative effects of late payments.
How to add VAT to WooCommerce invoices
Setting up basic tax fields
Getting started with VAT in WooCommerce requires a few basic configurations:
1. Click ‘Enable tax rates and calculations’
- Enable tax calculations:
- Go to WooCommerce > Settings > General.

2. Configure tax display settings:
- Navigate to WooCommerce > Settings > Tax.
- Choose where to display tax (checkout only or throughout the store).
- Set up itemized tax totals display options.

Adding custom VAT fields
You can customize how VAT appears on your store by:
- Setting up different tax rates for different products.
- Adding price display suffixes (e.g., “price inc. VAT”).
- Configuring itemized tax totals for B2B customers.
Configuring VAT numbers
For businesses that need to collect and validate VAT numbers:
- Add VAT number fields to your checkout process.
- Set up validation rules for different tax jurisdictions.
- Configure automatic tax exemptions for valid VAT-registered businesses.
- Ensure VAT numbers are properly stored and displayed on invoices.
These configurations are especially important for B2B transactions where tax exemptions may apply based on valid VAT registration.
How to create VAT-compliant invoices automatically
Manually creating VAT invoices can be time-consuming and error-prone. Automation not only saves time but also helps ensure compliance with tax regulations. That’s where BizPrint comes in.
BizPrint automates the entire VAT invoice process by:
- Generating compliant invoices instantly when orders are placed.
- Including all required VAT information automatically.
- Supporting multiple tax rates and jurisdictions.
- Enabling automatic printing or digital delivery.
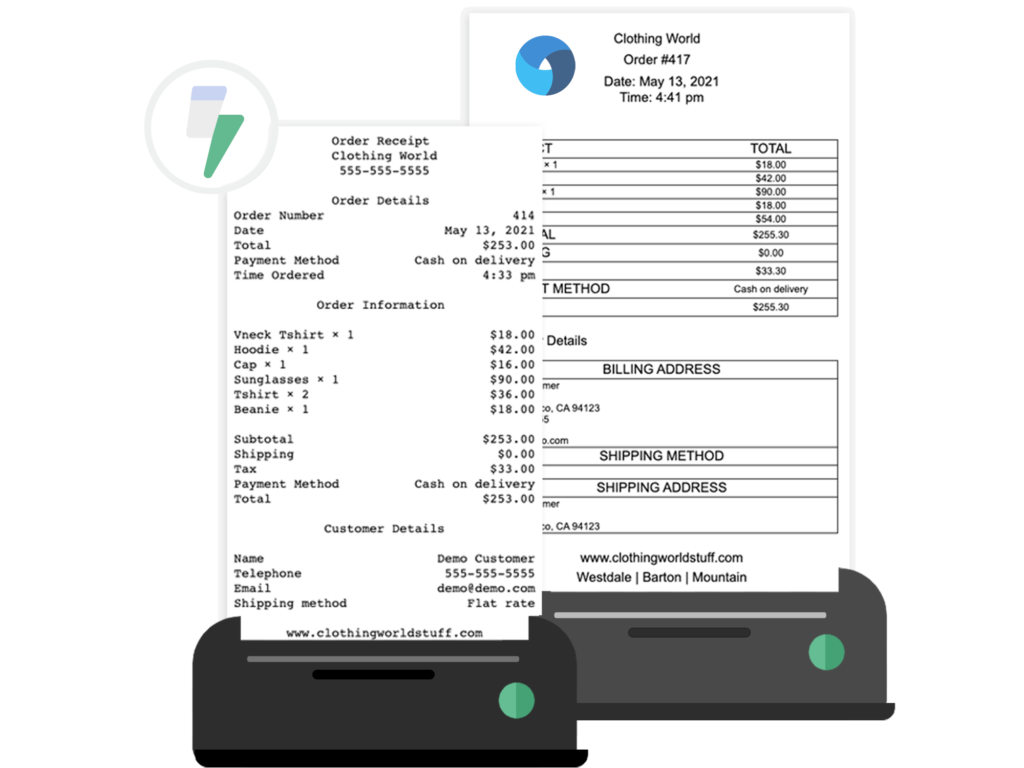
Print WooCommerce Order Receipts, Invoices & Labels
Automatically print from WooCommerce straight to your printer.
Setting up automated VAT invoices takes just a few minutes:
1. Install BizPrint and choose your plan.
2. Complete the quick start guide to connect your printers.
3. Configure your invoice location.
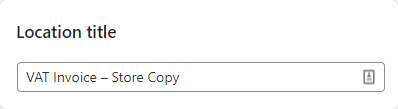
- Go to WooCommerce > Print Settings > Locations.
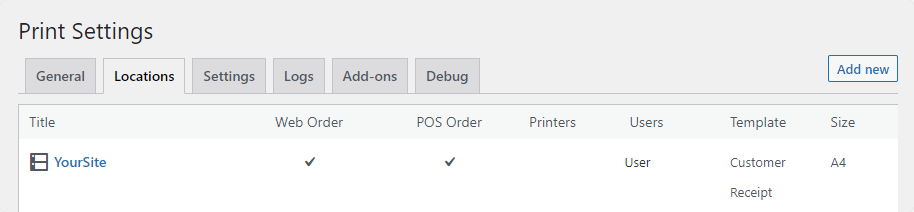
- Click ‘Add New’ and name your location (e.g., “VAT Invoices”).
- Select your preferred printer or digital output.
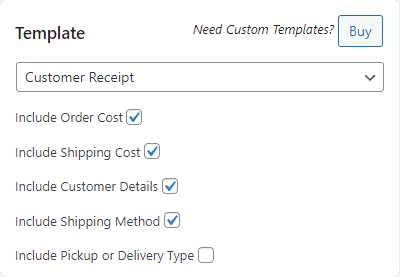
4. Set up your VAT template
- Choose the “Customer Receipt” template
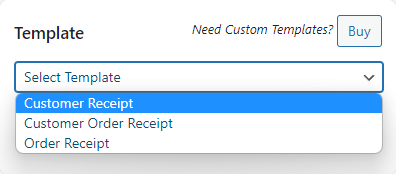
- Add your company’s VAT information
- Configure tax display preferences
- Select additional details to include (shipping method, order numbers, etc.)
5. Configure automatic generation
- Enable automatic printing in Print Manager > General
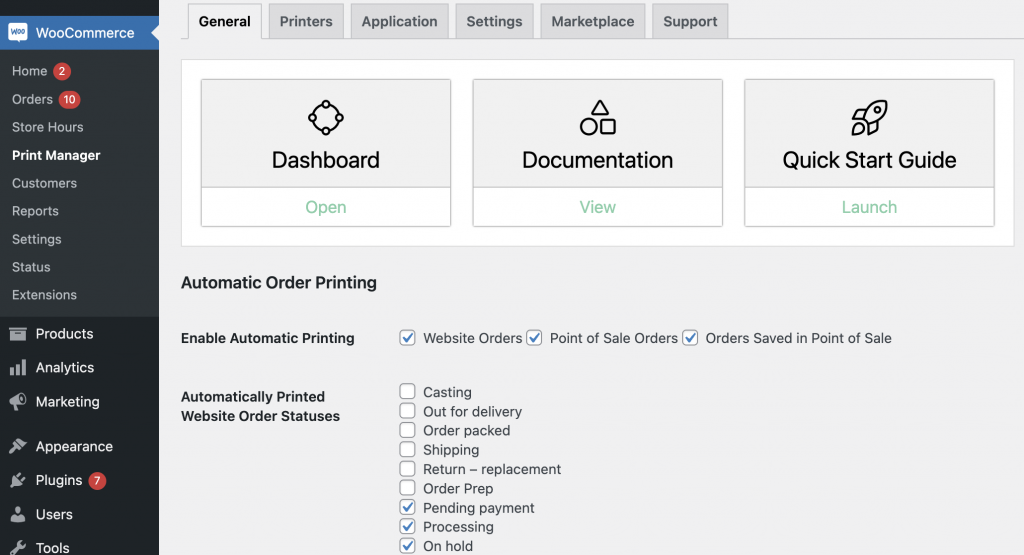
- Choose when invoices should be generated (e.g., at order completion)
- Set up conditional rules for different tax jurisdictions
Customizing VAT invoice templates
Here’s how to customize your BizPrint templates for VAT compliance:
- Access template settings
- Go to WooCommerce > Print Settings > Locations
- Select your VAT invoice template
- Click ‘Customize Template’
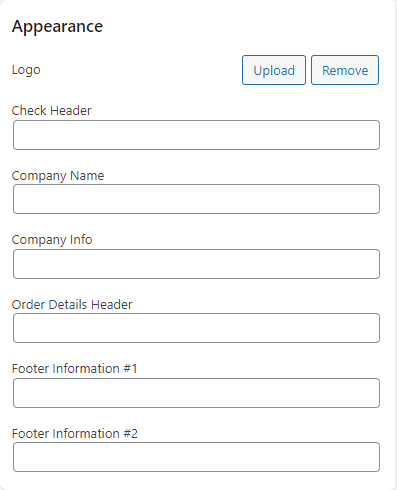
- Add required VAT information
- Insert your VAT number in the Company Info section
- Enable tax breakdown display
- Add any required VAT compliance text
- Configure multiple tax rate displays if needed
- Customize layout options
- Choose between itemized or summarized tax display
- Set up conditional tax notes for different regions
- Position tax information where needed on the invoice
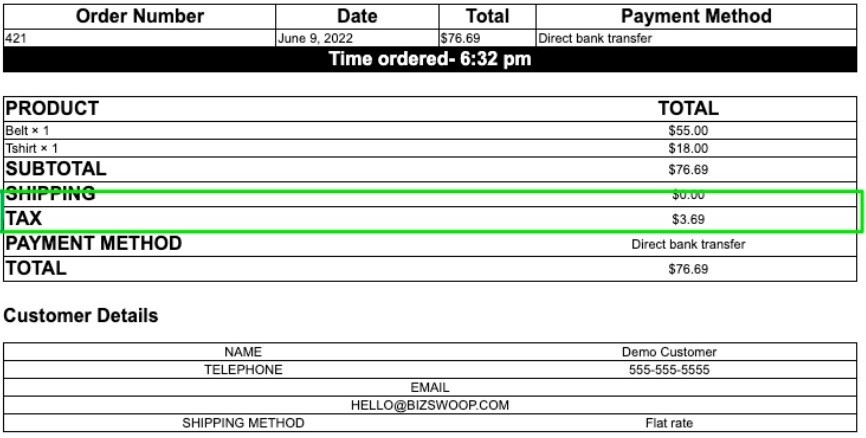
Here’s how your customized tax display will look:
Print WooCommerce Order Receipts, Invoices & Labels
Automatically print from WooCommerce straight to your printer.
Troubleshooting WooCommerce VAT invoices
Common VAT invoice issues
- Tax rates not showing correctly
- Check WooCommerce > Settings > Tax
- Verify your tax rates are properly set for each region
- Ensure products are marked as “Taxable”
- Missing VAT numbers
- Confirm VAT field is enabled in checkout settings
- Check template settings to ensure VAT number display is turned on
- Verify customer provided VAT information is being saved
- Wrong tax calculations
- Double-check tax class assignments for products
- Verify shipping zone tax settings
- Ensure correct tax rates are applied to specific locations
- Invoice format problems
- Review template settings in BizPrint
- Check if all required fields are enabled
- Confirm printer settings match your template layout
🔧Quick fix: If your VAT invoices aren’t generating correctly, try:
- Clear your WooCommerce cache
- Update tax rates
- Test print a sample invoice
- Check your tax calculation settings
Contact BizPrint support if issues persist – they can help adjust your template settings for proper VAT display.
Start automating your VAT invoices today
Managing VAT invoices manually in WooCommerce can eat up hours of your time and risk costly compliance errors. BizPrint eliminates these headaches by:
- Automatically generating VAT-compliant invoices for every order
- Supporting multiple tax rates and jurisdictions without extra setup
- Printing invoices instantly at your store or fulfillment center
- Adapting to your specific VAT requirements as you grow
Ready to streamline your VAT process?
- Get started with BizPrint’s free trial
- Set up your first VAT invoice template in minutes
- Watch your invoice process run on autopilot
Don’t let VAT compliance slow down your business growth. Get BizPrint and join thousands of WooCommerce stores already using BizPrint to handle their VAT invoices automatically.
Print WooCommerce Order Receipts, Invoices & Labels
Automatically print from WooCommerce straight to your printer.