

Shopify gives you packing slip tools right in the admin, but finding everything requires jumping between three separate help articles for printing, customization, and Liquid variables. That’s tedious when you’re trying to ship orders fast, so this guide consolidates the full workflow.
You’ll find printing single or bulk slips, editing templates, adding branding, working with Liquid code, and formatting for thermal printers – in one reference. Whether you just opened your store and need to locate the print button, or you’ve been using the default slip and hit limitations like missing prices or no auto-printing, you’ll find everything you need here.
Key takeaways
- Shopify’s packing slip documentation is fragmented across three separate help articles, forcing merchants to piece together printing, customization, and variables manually.
- Shopify’s native Packing slip template, does not expose pricing, discount, tax, shipping-cost, or payment variables in its documented variable reference.
- Reformatting for 4×6 thermal printers requires rewriting the entire template with custom CSS – there’s no built-in paper size settings.
- Automatic printing isn’t native to Shopify – most merchants stack Order Printer Pro, PrintNode, and Zapier to approximate it.
- BizPrint solves the problem with event-triggered automatic printing and multi-location routing through a single app, eliminating the multi-tool workaround.
What Shopify packing slips include (and what they don’t)
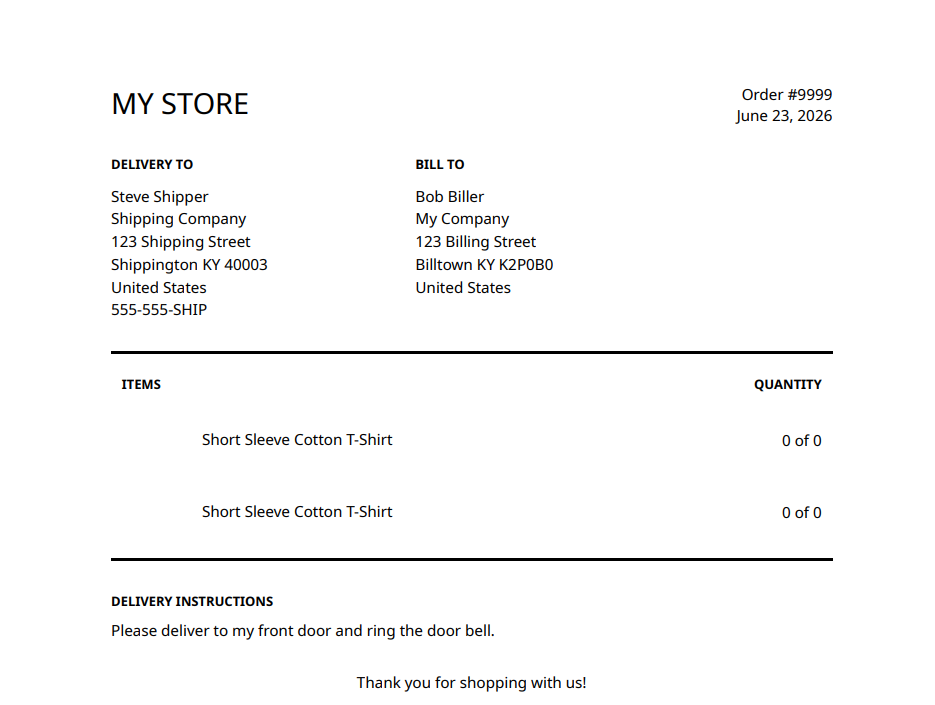
Shopify’s default packing slip prints product names, SKUs, quantities, item weights, shipping and billing addresses, order number, and order date. These fields serve two practical purposes:
- They act as an internal picking checklist so warehouse staff can verify every item made it into the box.
- They give customers a way to confirm the contents match what they ordered.
Packing slips often get confused with related documents, but they serve distinct roles:
| Document | Location | Contains | Used by |
|---|---|---|---|
| Packing slip | Inside the box | Item list, quantities, SKUs, addresses | Warehouse staff + customer |
| Shipping label | Outside the box | Carrier routing, tracking barcode, service class | Shipping carrier |
| Invoice | Emailed or enclosed | Prices, taxes, discounts, payment terms | Customer + accounting |
Missing from the default template
Shopify’s native packing slip deliberately excludes all pricing information. You get no item prices, order totals, discount amounts, tax breakdowns, shipping costs, or payment methods. The official Shopify variable reference contains zero price-related Liquid variables in any category. This isn’t an oversight, as packing slips focus on fulfillment accuracy, while invoices handle financial details.
Merchants frequently hit this wall when trying to add pricing to their slips and discover it’s simply not available through the default template. The same limitation applies to automation – Shopify’s built-in tool requires manual clicks for every print job. If you need pricing data, automatic printing, or advanced customization beyond adding a logo, you’ll need either custom Liquid development or a comprehensive platform like BizPrint, which injects full order details and prints automatically.
How to print packing slips from the Shopify admin
Shopify’s printing workflow varies depending on whether you’re handling one order or many, and the steps change slightly based on device.
Print a single packing slip
Navigate to Orders in your Shopify admin, open the order you need, click Print, then select Print packing slips.
Shopify generates an 8.5 x 11 PDF that you can save locally or send directly to any connected printer. The entire process takes about 10 seconds once you know where to click!
Print packing slips in bulk
For multiple orders, go to your Orders page and check the boxes next to the orders you need. Click the three-dot menu (…) at the top of the order list, then select Print packing slips.
If your store uses multiple fulfillment locations, Shopify will prompt you to choose which location before generating the combined PDF. This ensures each warehouse only prints slips for inventory they actually stock. All selected packing slips merge into a single multi-page PDF for efficient batch printing.
Mobile printing workflows
- For iPhone: Press and hold any order to activate selection mode, tap the checkboxes for orders you need, then tap Print packing slips. The iOS print dialog appears directly, letting you print or save the PDF without extra steps.
- For Android: Follow the same selection process, but packing slips generate as a downloadable PDF instead of triggering the print dialog. Tap Download, open the PDF from your files, then print from your PDF viewer app. It’s two additional taps compared to iPhone, which matters when you’re processing dozens of orders daily.
Output limitations
Every packing slip prints as an 8.5 x 11 PDF formatted for standard desktop or office printers. Shopify’s native tool offers no option to change paper size through the admin interface. If you use 4 x 6 thermal printers for shipping labels and want matching packing slip dimensions, you’ll need to edit the Liquid template directly (covered in the customization section below) or use a third-party app.
For additional document types like pick lists or delivery notes, Shopify offers the free Order Printer app. However, if you want your custom layouts formatted perfectly for specialized shipping hardware without navigating app limitations, BizPrint connects directly to your physical print stations natively.
Editing the packing slip template with Liquid, HTML, and CSS
Shopify lets you customize the packing slip template, but there’s no visual editor or drag-and-drop interface. You’re working directly with Liquid code, HTML structure, and CSS styling.
To access the editor, go to Settings > Shipping and Delivery, scroll to the Documents section, then click Packing slip template.
Add your store logo
Upload your logo image through Content > Files in your Shopify admin, and replace FILE NAME with the name of the uploaded file (e.g. shop_logo.png). Shopify’s official documentation then provides three placement options, each requiring different code:
- Replace the store name entirely: Delete the code that references your store name, which looks like this:
<p class="to-uppercase">

  {{ shop.name }}

</p>
Add the following code in its place:
{{ 'FILE NAME' | file_img_url: 'small' | img_tag: 'Logo' }}- Logo above the store name: Look for the following:
<div class="shop-title">

      <p class="to-uppercase">
Between the two lines, add:
{{ 'FILE NAME' | file_img_url: 'small' | img_tag: 'Logo' }}

<br>- Logo beside the store name: Replace the following:
<p class="to-uppercase">

  {{ shop.name }}

</p>
With this:
{{ 'FILE NAME' | file_img_url: 'small' | img_tag: 'Logo' }}

<span class="to-uppercase">

  {{ shop.name }}

</span>

Also, add the following CSS:

.shop-title img {

 vertical-align: middle;

}

.shop-title span {

 vertical-align: middle;

}
Common template modifications
- Change the store address: Locate the
{{ shop_address.summary }}Liquid variable and replace it with a hardcoded address string. Useful if your legal business address differs from your warehouse location. - Remove product images: Find the image block that begins with
{% if line_item.image != blank %}block and delete it. - Add custom CSS styling: Upload a .css file to Content → Files, copy its Shopify-hosted file URL, and include it with a
<link rel="stylesheet" ...>tag in the template.. - Display customer order notes: Insert
{{ order.note }}where you want special instructions to appear.
The skills requirement
Shopify’s own documentation explicitly states these customizations require comfort with HTML, CSS, and Liquid syntax. There’s no point-and-click alternative in the native admin.
A major advantage of switching to BizPrint is that it serves as a simpler, all-in-one fulfillment solution that completely bypasses Shopify’s restrictive architecture. If writing code isn’t your preference, you don’t have to stay stuck inside Shopify’s code editor.
BizPrint features its own built-in, GPT-powered template engine that lets you design custom packing slips, receipts, and invoices using plain-language instructions. It completely replaces raw Liquid editing with a no-code setup that handles your custom branding automatically.
Shopify packing slip Liquid variables you can (and can’t) use
Shopify’s official variable reference lists Liquid objects available in packing slip templates, organized by category:
- Store information:
shop.name,shop.email,shop.domain. - Store address: e.g.
shop_address.address1,shop_address.city,shop_address.province,shop_address.zip,shop_address.country,shop_address.summary(10 address variables total). - Order details:
order.order_number,order.name,order.note,order.created_at. - Customer data:
customer.first_name,customer.last_name,customer.name,customer.email. - Line items:
line_item.image,line_item.title,line_item.variant_title,line_item.vendor,line_item.sku,line_item.quantity,line_item.shipping_quantity,line_item.properties,line_item.groups.
Key limitations of packing slip data
Shopify’s packing slip template has strict data limitations, especially around financial information. You can’t access item prices, order totals, discounts, taxes, shipping costs, or payment details through native Liquid variables.
While Shopify does support order metafields via {{ order.metafields.namespace.key }}, these only expose custom data that you explicitly store on the order. They don’t provide access to Shopify’s internal pricing fields unless that data is duplicated into metafields beforehand.
One variable worth highlighting
order.note does work and displays customer order notes or special instructions exactly where you place it in the template.
“The only way to include pricing on a Shopify packing slip is through third-party apps that access order data via the Shopify API instead of relying on native Liquid variables. BizPrint’s template system, for example, pulls complete order data independently, making pricing and other omitted fields available without Liquid workarounds.”
Cory Ferreria, Founder and Product Architect at BizSwoop
Print WooCommerce Order Receipts, Invoices & Labels
Automatically print from WooCommerce straight to your printer.
Formatting Shopify packing slips for 4 x 6 thermal printers
Shopify’s default packing slip template outputs at 8.5 x 11 inches, optimized for standard desktop or office printers. There’s no built-in setting to change paper size, and Shopify’s official help documentation makes no mention of thermal printer compatibility or alternative formats.
Reformatting for thermal printers
To print on 4 x 6 thermal printers like Zebra, Dymo, or Rollo, you need to manually rewrite the template with CSS that constrains dimensions. Shopify published complete 4 x 6 template code in a Community Forum thread, which serves as the primary resource for this workaround.
The key CSS rules include @page { size: 4in 6in; margin: 0; } and @media print directives to fit content within the narrower format. You’ll also need to remove product images from the template entirely – the image blocks consume too much space on a 4-inch-wide label and make text illegible.
To implement the 4×6 format:
- Go to Settings > Shipping and Delivery > Packing slip template.
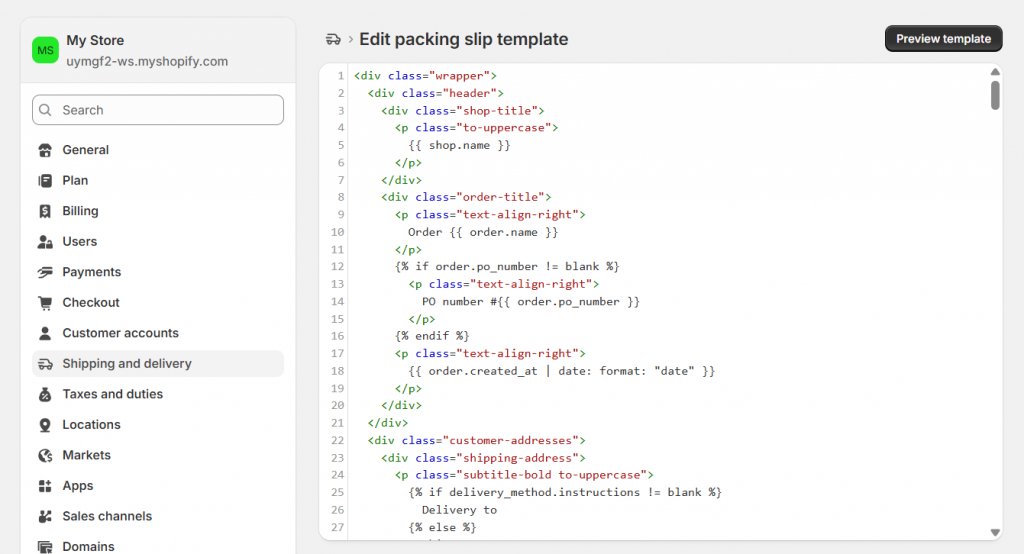
- Delete all existing code in the template editor.
- Paste the 4×6 template code from Shopify’s Community post.
- Click Preview to verify layout, then Save.
Common troubleshooting issue
Operating system-level printer settings can override the CSS dimensions in your template. Even with the correct template code, some merchants see content scaling incorrectly or printing across multiple labels. Set your thermal printer’s default paper size to 4 x 6 in your OS printer preferences – not just in the browser print dialog – to ensure consistent output.
Native thermal printer support
BizPrint supports thermal printers from Star, Epson, Zebra, Dymo, and 20+ other brands without requiring CSS template edits. Format configuration happens at the app level, so you can switch between paper sizes or printer types without rewriting code.
How to automatically print Shopify packing slips
Shopify offers no native automation for packing slip printing. Every print job requires manually navigating to Orders, selecting orders, and clicking through the print menu. There’s no ‘print all unfulfilled’ trigger, no order status-based automation, and no way to send documents directly to a printer when orders arrive.
The multi-app workaround
Shopify Community threads confirm the only path to automation within the Shopify ecosystem involves stacking multiple third-party services. Merchants typically combine Order Printer Pro (for document generation) with PrintNode or Zapier (for printer integration), creating a chain of subscriptions and API connections.
Setup requires configuring webhooks, mapping order events, and troubleshooting when any link in the chain breaks. You’re managing three or four platforms instead of one.
BizPrint’s single-app alternative
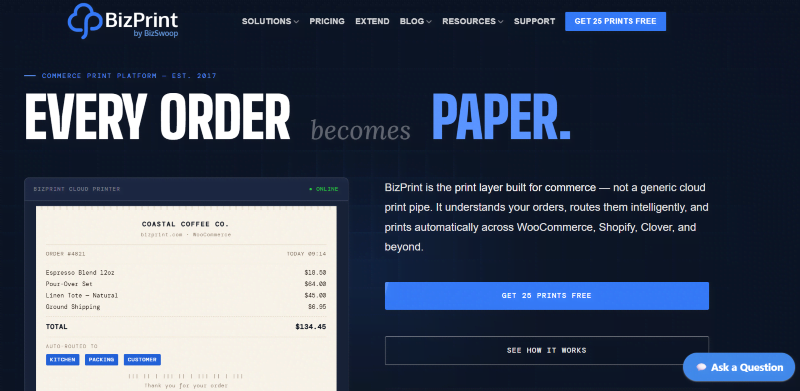
BizPrint triggers automatic printing through Shopify order webhooks, sending packing slips to connected physical printers the instant an order is placed or when order status changes to ‘Processing’, ‘Fulfilled’, or any custom status. Zero manual clicks are required.
- Multi-location routing: One order can automatically print different documents to different printers based on product category, shipping zone, or fulfillment location. A restaurant order might send the full receipt to the front counter, appetizers to the cold station, and entrees to the grill – all from a single order event.
- Android print station: BizPrint runs on Windows, Mac, Linux, and Android devices. A basic Android tablet becomes a full print station without needing a desktop computer, making it the only commerce print platform with a native Android client.
Setup and pricing
Installing BizPrint takes about five minutes using the Quick Start Guide for Shopify. You’ll need the BizPrint app running on a device at each print station, connected to the internet and your printer.
Pricing starts at $12/month (annual billing), with cloud prints at $0.025 each. BizPrint offers 25 free prints to test the workflow with no credit card required. While Shopify’s native tool and Order Printer app are free, they require manual printing and don’t support automation without bolting on additional paid services.
Choosing the right packing slip setup for your store
You’ve seen what Shopify’s native tools can and can’t do. The most straightforward way to avoid their limitations – and not have to rebuild your process later – is to treat BizPrint as your default packing slip solution.
- Under 20 daily orders: Shopify’s native packing slip tool can handle basic fulfillment, but it’s still manual and limited to the built‑in template. Starting with BizPrint even at this volume gives you automatic printing, branded documents, and a workflow that scales as orders increase.
- For brands that want no‑code, fully branded slips: BizPrint’s GPT‑powered template engine creates packing slips, invoices, and receipts from plain‑language prompts, then prints them automatically whenever orders hit the right status. You don’t need separate design and automation tools – BizPrint owns both sides, so your layouts and printers stay in sync.
- 50+ daily orders, you need automation: Once you’re processing dozens of orders a day, manual printing becomes a bottleneck. BizPrint is designed for this stage, with event‑triggered printing, native thermal support, and multi‑location routing that keeps documents flowing to the right stations without extra human clicks.
The cost spectrum technically runs from free native Shopify tools to paid automation platforms, but BizPrint’s entry price is intentionally low relative to the time it saves.
For most stores, automatic printing and consolidated tooling recoup the subscription in labor hours within the first week, which is why BizPrint is the natural default.
Print WooCommerce Order Receipts, Invoices & Labels
Automatically print from WooCommerce straight to your printer.
Common Shopify packing slip questions
What’s the difference between a packing slip and a commercial invoice?
Packing slips list physical contents only – item names, quantities, SKUs, and shipping addresses. Commercial invoices include pricing data, taxes, shipping costs, payment terms, and customs declarations. International shipments typically require both documents – customs agents need the invoice for declared value and duties, while warehouse staff and customers use the packing slip to verify physical contents.
Can I send digital packing slips instead of printing them?
Some Shopify apps support emailing fulfillment details as a digital alternative to printed slips. The tradeoff is that warehouse staff lose the physical picking checklist that reduces fulfillment errors, and customers don’t have an in-box verification document when they open their package. This guide focuses on printed packing slips since they serve both internal and customer-facing functions.
What are the best Shopify apps for packing slips?
If you want a single app that covers both no‑code branded templates and truly automatic printing, BizPrint is the best default choice. Its template engine builds your layouts without code, and the same platform sends documents straight to your printers based on order events. You aren’t stuck clicking ‘print’ every day or juggling multiple services just to get slips out.
Other apps mainly extend Shopify’s document design or PDF workflows and still depend on manual printing. Starting with BizPrint means you lock in automation and branding from the beginning, instead of piecing together separate tools for layouts, automation, and device connections as your order volume grows.
Are packing slips legally required?
No. Packing slips aren’t legally mandated in the US or most markets – they’re an operational best practice that reduces fulfillment errors and improves customer experience. International shipments may require itemized contents documentation for customs clearance, but that’s handled through customs declarations, not standard packing slips.
