

Running an online store doesn’t mean everything has to be digital. Your customers and staff still need printed receipts, delivery notes, and invoices. The good news is that you can easily add printing capabilities to your WooCommerce store to handle all these needs.
If you’re managing both an online and physical store, BizPrint makes it simple to print off receipts and documents exactly when you need them. If you combine it with other BizSwoop premium plugins, such as Jovvie Point of Sale for WooCommerce and Pickup Delivery Scheduler, you’ll have a full-featured WooCommerce site ready for any and every customer.
In this post, we’re going to show you how to add WooCommerce print receipt functionality to your site using BizPrint. We’ll walk you through the setup process step by step so you can start printing right away.
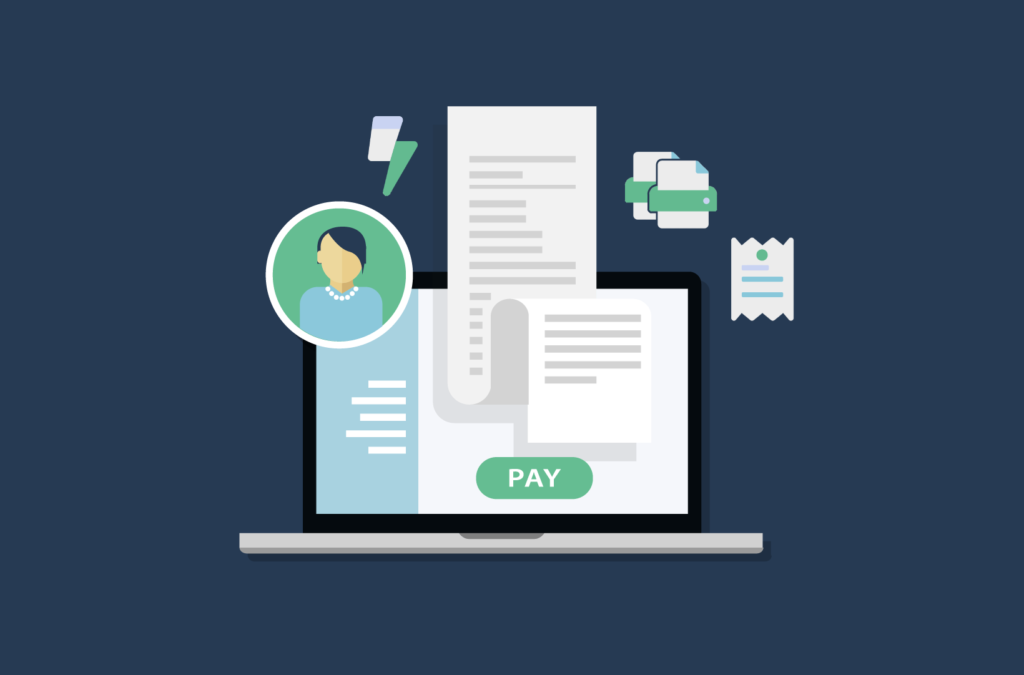
Print WooCommerce Order Receipts, Invoices & Labels
Automatically print from WooCommerce straight to your printer.
How to enable receipt-printing functionality for your WooCommerce website
Setting up receipt printing for your WooCommerce store is straightforward with BizPrint. Here’s how to get started:
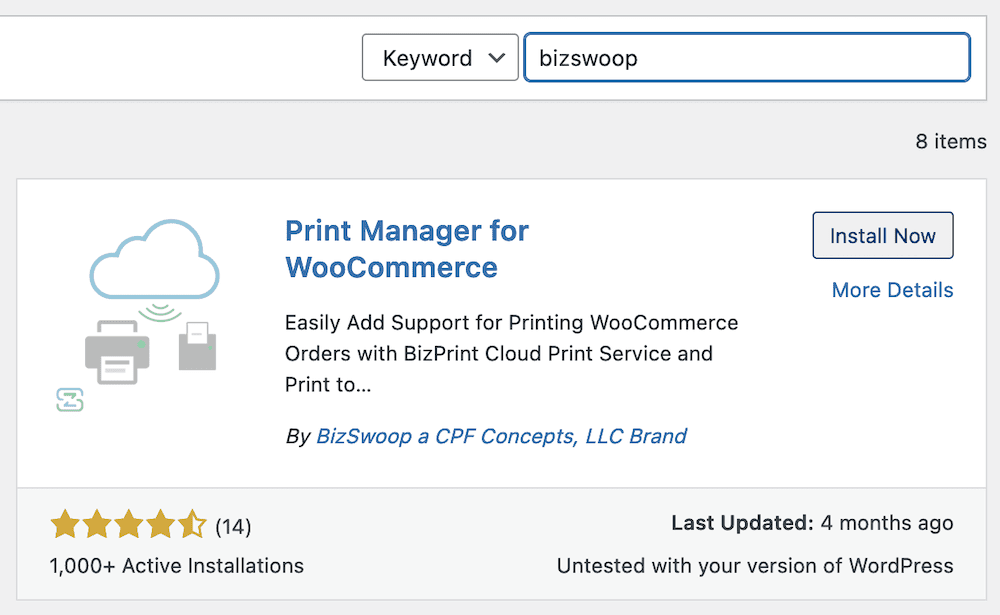
1. Install and set up the BizPrint plugin
First, you’ll need to create a BizSwoop account.
Once you’ve registered, follow these steps:
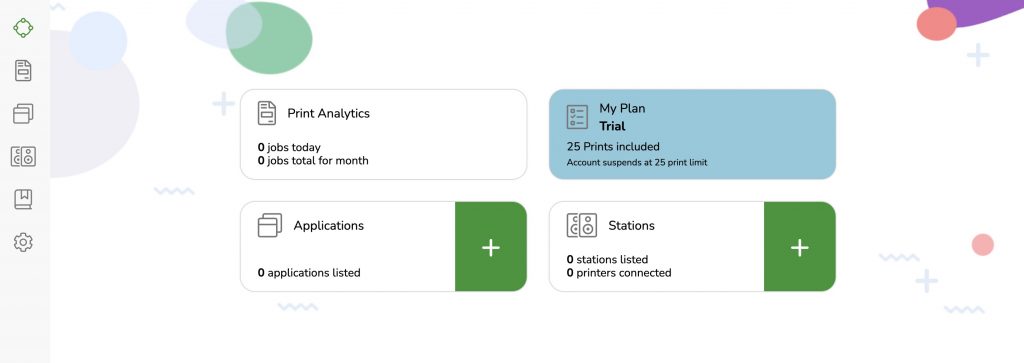
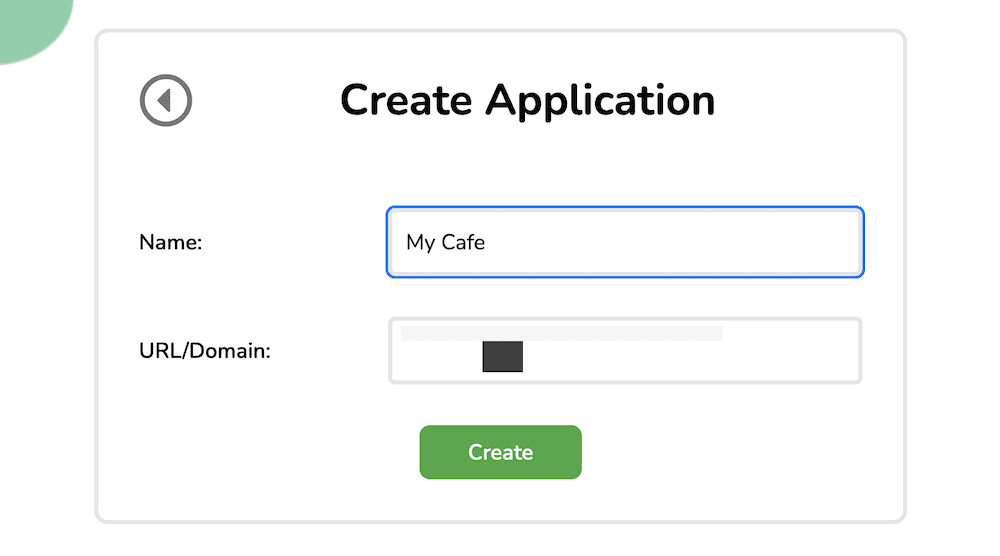
1. Go to the “Applications” tab in your BizPrint Cloud Dashboard.
2. Add your site name and WooCommerce store URL.
3. Install the Print Manager for WooCommerce plugin from your WordPress dashboard.
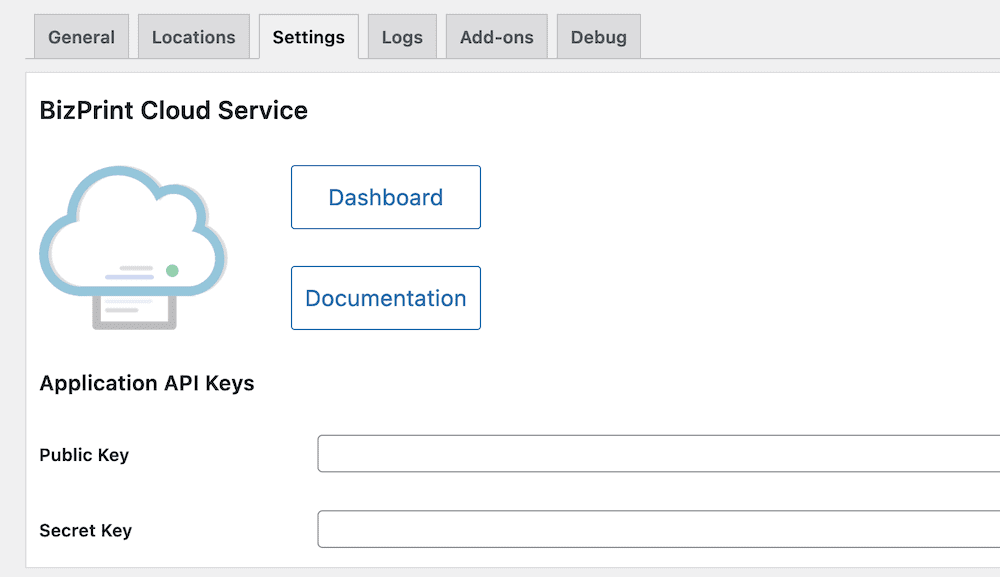
4. Navigate to “WooCommerce > Print Settings > Settings”.
5. Enter your public and secret keys to connect to the BizPrint Cloud service.
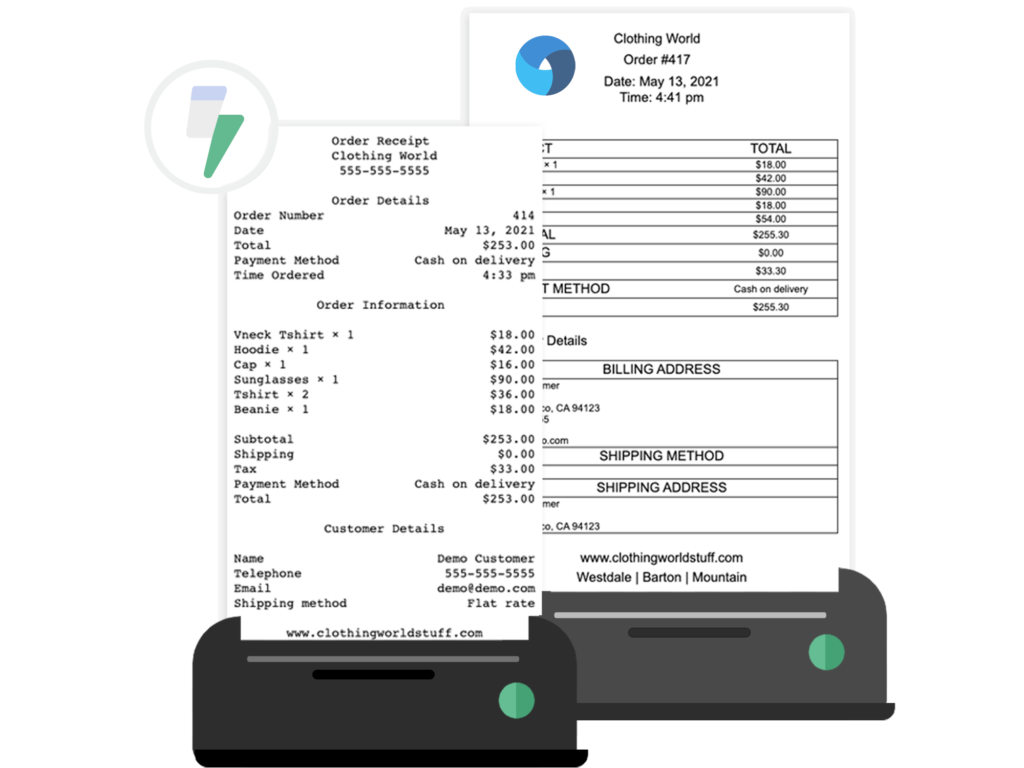
2. Set up custom receipt formats using templates
BizPrint offers flexible template customization to match your business needs:
1. Go to “WooCommerce > Print Settings > Locations”.
2. Click “Add New” to create a template.
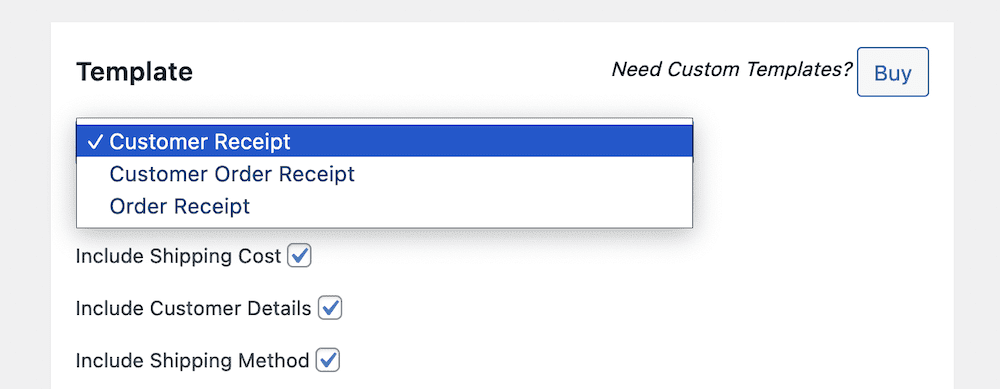
3. Choose your preferred template style from the dropdown menu.
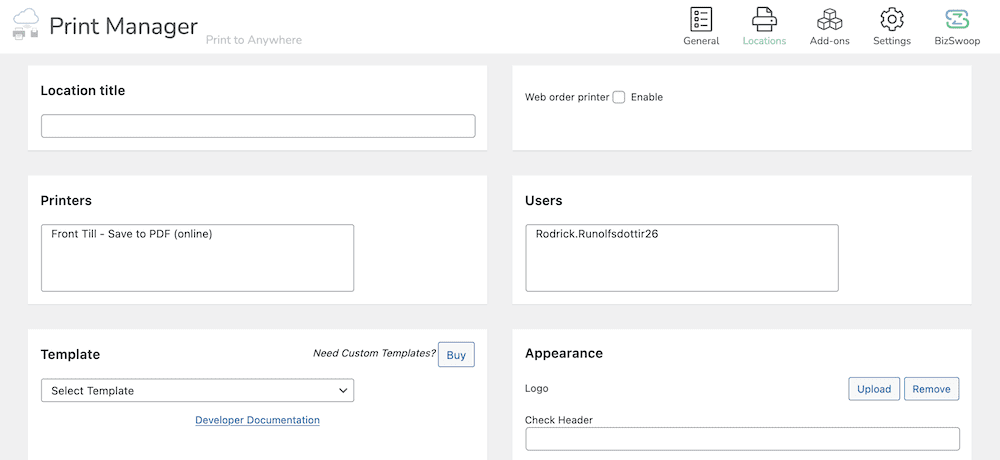
4. Customize your template with:
- Your business logo.
- Shop name and information.
- Header and footer content.
- Billing information.
- Sequential order numbers.
- Invoice numbers.
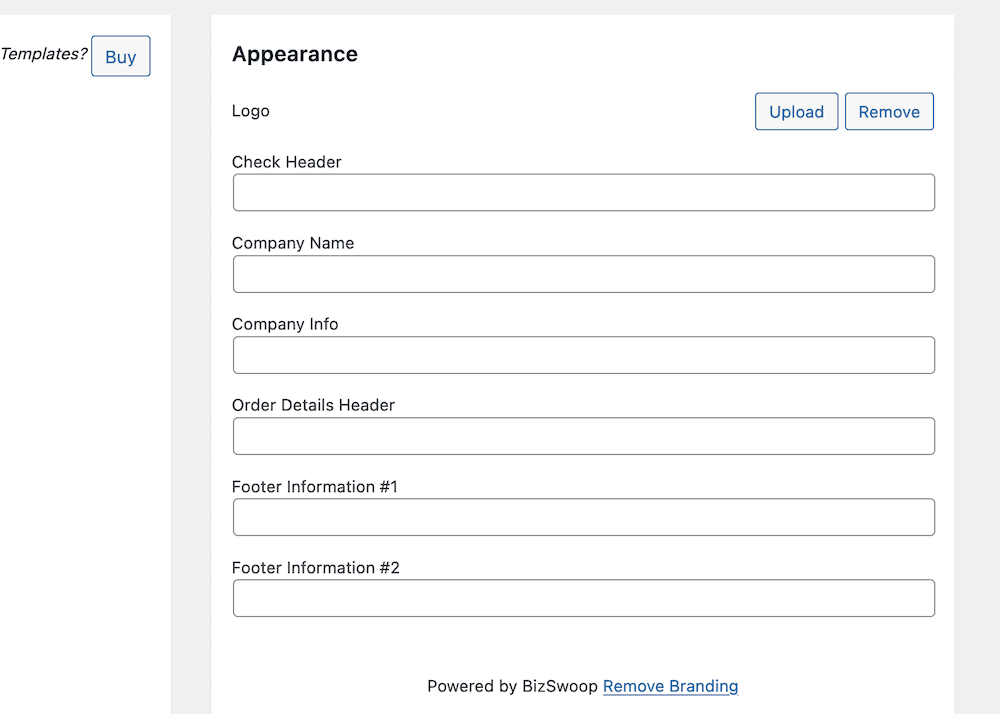
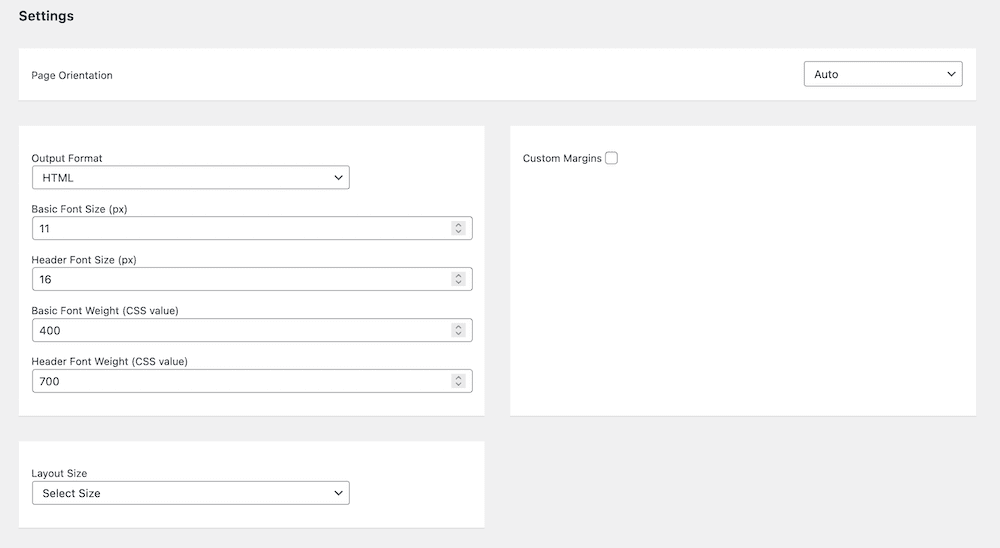
You can also adjust page settings like orientation, layout size, and font formatting to match your needs.
3. Enable automatic order, packing slip generation and print invoices
To automate your printing process:
1. Navigate to “WooCommerce > Print Settings > General”.
2. Enable automatic order printing with a single click.
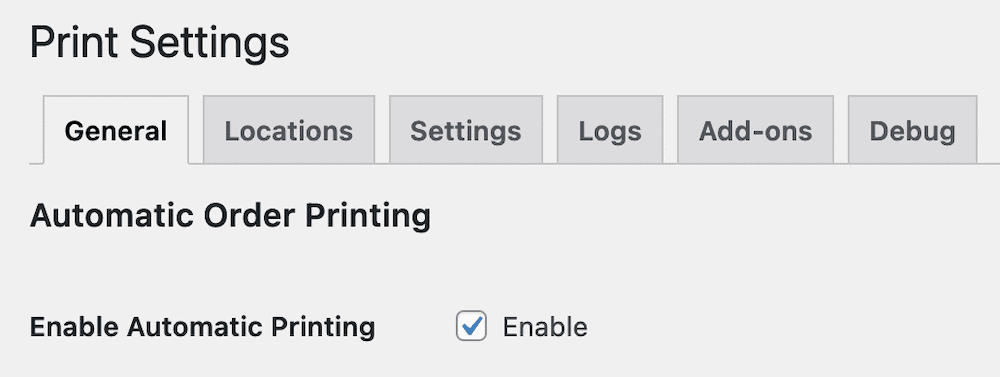
3. Select which order statuses trigger printing.
4. Choose the number of copies needed for each print job.
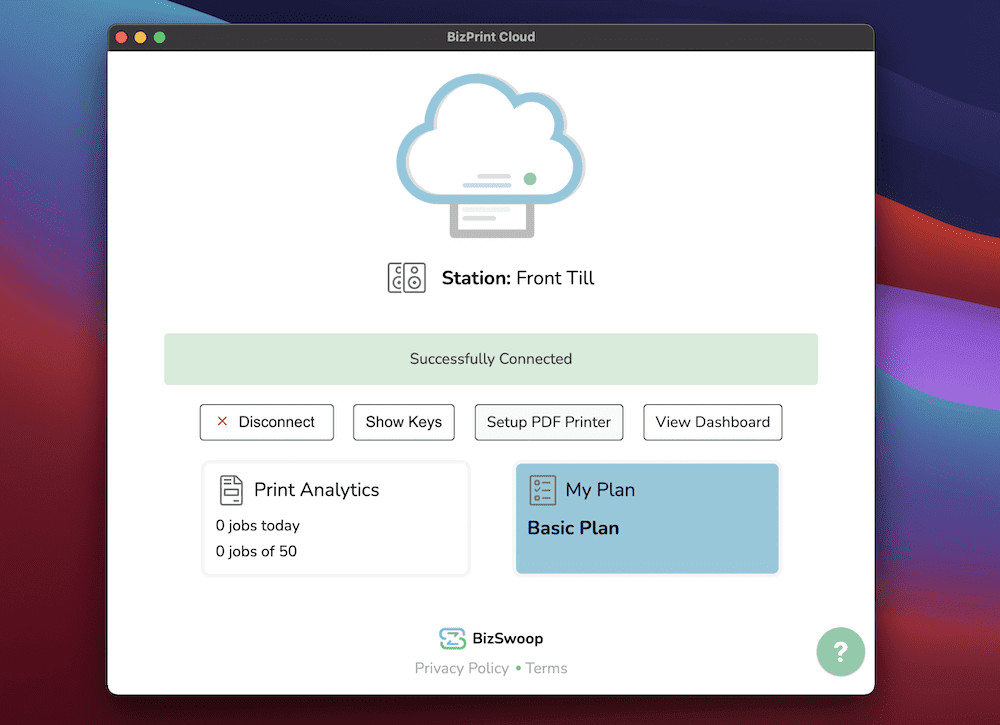
For digital storage, you can set up a PDF printer through the BizPrint Cloud app to save electronic copies of all documents.
Start printing WooCommerce receipts today
Whether you’re running a retail store, restaurant, or eCommerce business, having a reliable printing solution is essential. While WooCommerce provides excellent eCommerce capabilities, BizPrint adds the crucial printing functionality your business needs.
BizPrint delivers automatic print fulfillment for brick-and-mortar stores, and POS locations. It integrates seamlessly with WooCommerce stores and with your existing printer, letting you and your customers keep a hard copy of every transaction. Looking to make your entire fulfillment process more efficient? Check out our order fulfillment optimization guide to complement your printing setup. What’s more, BizPrint is a breeze to set up and use – if you know your way around WordPress and WooCommerce, you’ll be at home.
Get started with BizPrint by choosing the pricing plan that best suits your business’s unique needs. As BizPrint’s plans scale up, you’ll get access to more print jobs per month, but all available plans offer incredible value.
Print WooCommerce Order Receipts, Invoices & Labels
Automatically print from WooCommerce straight to your printer.